 Save to Pinterest
 The first time I made these lemon bars was during a spring cleaning spree, of all things. With windows open and the scent of lemon cleaner in the air, I craved something that captured that same brightness but in dessert form. As I zested lemons over my kitchen counter, little yellow curls flying everywhere, I realized cooking with lemons had the same mood-lifting effect as cleaning with them—but with the delicious promise of buttery, crumbly goodness at the end.
Last summer, I brought these to my neighbors potluck after they helped me jump-start my car. The plate was passed around with increasing enthusiasm as the evening progressed, and my gruff next-door neighbor who rarely speaks asked for the recipe by simply sliding his empty plate toward me with a raised eyebrow. Even my friend who claims to hate anything too sweet took a second piece, picking up the crumbs with her fingertip.
Ingredients
- Fresh lemons: Always use fresh lemons rather than bottled juice as the oils in the zest bring an aromatic quality that transforms the entire dessert.
- Unsalted butter: I once made these with salted butter in a pinch and had to adjust everything else, so trust me when I say unsalted gives you better control over the final flavor.
- All-purpose flour: The structure for both our crust and filling, providing that perfect balance between tender and stable.
- Granulated sugar: Creates that crystalline texture in the crumb topping while dissolving beautifully into the lemon filling.
- Eggs: These magical ingredients transform our lemon mixture from liquid to that perfect soft set that defines a great lemon bar.
Tired of Takeout? 🥡
Get 10 meals you can make faster than delivery arrives. Seriously.
One email. No spam. Unsubscribe anytime.
Instructions
- Prepare your foundation:
- Preheat your oven to 350°F and line your 9x9 pan with parchment, leaving overhang on two sides for easy lifting later. This simple step has saved me countless broken bars.
- Mix your multipurpose crumb:
- Combine the flour, sugar, baking powder, and salt before pouring in melted butter. The mixture should look like wet sand that clumps when pressed between your fingers.
- Build the base:
- Reserve that crucial 1/2 cup of crumb mixture, then press the remainder firmly into your prepared pan. I use the bottom of a measuring cup to create an even layer with slight pressure.
- Pre-bake the crust:
- Just 10-12 minutes transforms the base from pale dough to a lightly golden foundation that can stand up to our lemon filling. Your kitchen will start smelling like butter cookies at this stage.
- Whisk the sunshine filling:
- While the crust bakes, whisk eggs and sugar until the mixture lightens slightly in color. Add your fresh lemon juice, zest, flour, baking powder and salt, whisking until silky smooth.
- Assemble and finish baking:
- Pour the filling over the hot crust, then sprinkle those reserved crumbs evenly across the top. Watch for little windows of yellow peeking through the crumb layer.
- Exercise patience:
- After baking for 20-25 minutes, the hardest part begins—waiting. The bars need that full hour at room temperature plus another hour in the refrigerator to properly set.
- Slice and serve:
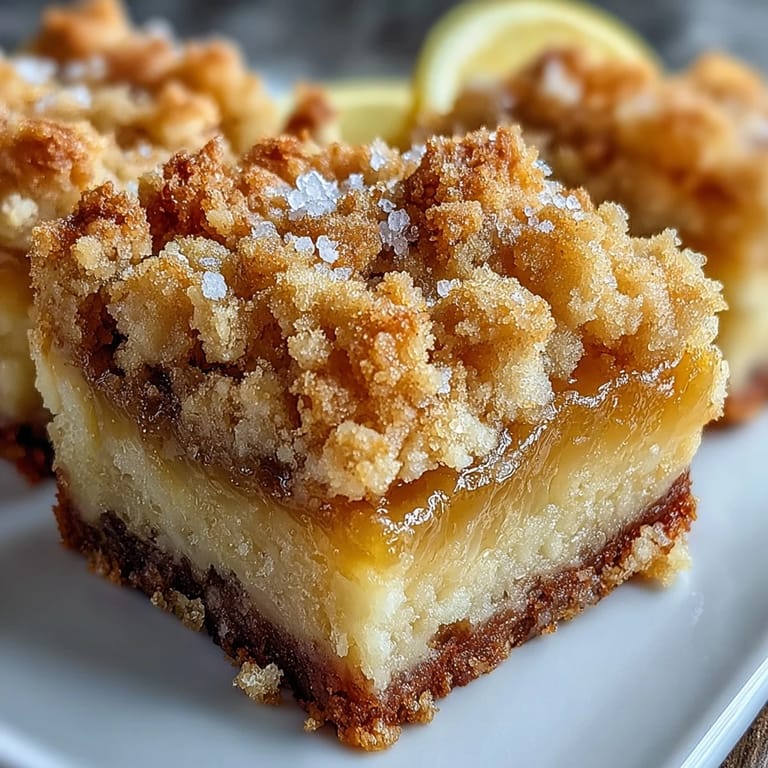
- Use a sharp knife, wiping between cuts, to create clean squares. A light dusting of powdered sugar adds both beauty and an extra hint of sweetness against the tart lemon.
 Save to Pinterest
 These lemon bars became my signature potluck contribution after bringing them to a work gathering during a particularly stressful project deadline. Our team had been working late nights, and the bright zing of lemon somehow lightened the mood in our conference room. My normally serious boss took a bite and suddenly launched into a story about his grandmothers lemon tree in Florida, and for a moment, spreadsheets and timelines were forgotten as we all connected over this simple pleasure.
Balancing Sweetness and Tartness
Finding the perfect balance between sweet and tart is the hallmark of a great lemon dessert. In my early attempts, I made these bars with regular grocery store lemons, which worked fine. But when I tried them with Meyer lemons during their brief winter season, the naturally sweeter profile created an entirely different dessert—still bright but with honeyed undertones. If using regular lemons and you prefer less pucker, consider adding an extra tablespoon of sugar to the filling.
Storage and Make-Ahead Tips
Though these bars keep beautifully in the refrigerator for up to a week, their texture is at its prime within the first three days. The powdered sugar will eventually dissolve into the top layer due to the moisture in the bars, so I typically dust them right before serving if theyre not being eaten immediately. For longer storage, you can freeze cut bars between layers of parchment for up to three months—thaw them in the refrigerator overnight before bringing to room temperature for about 20 minutes before serving.
Serving Suggestions
While perfect on their own, these lemon bars transcend to special-occasion status with thoughtful accompaniments. I love serving them with a small dollop of lightly sweetened whipped cream or a fresh raspberry placed on top of each square. Sometimes for dinner parties, I place a tiny sprig of fresh thyme on each bar for a sophisticated herbal note that surprises and delights guests.
- For summer gatherings, serve these bars slightly chilled alongside fresh berries for a color contrast that brightens any dessert table.
- A scoop of vanilla bean ice cream transforms these bars into a plated dessert worthy of any restaurant.
- Consider a light drizzle of white chocolate for special occasions, creating beautiful visual contrast against the yellow filling.
 Save to Pinterest
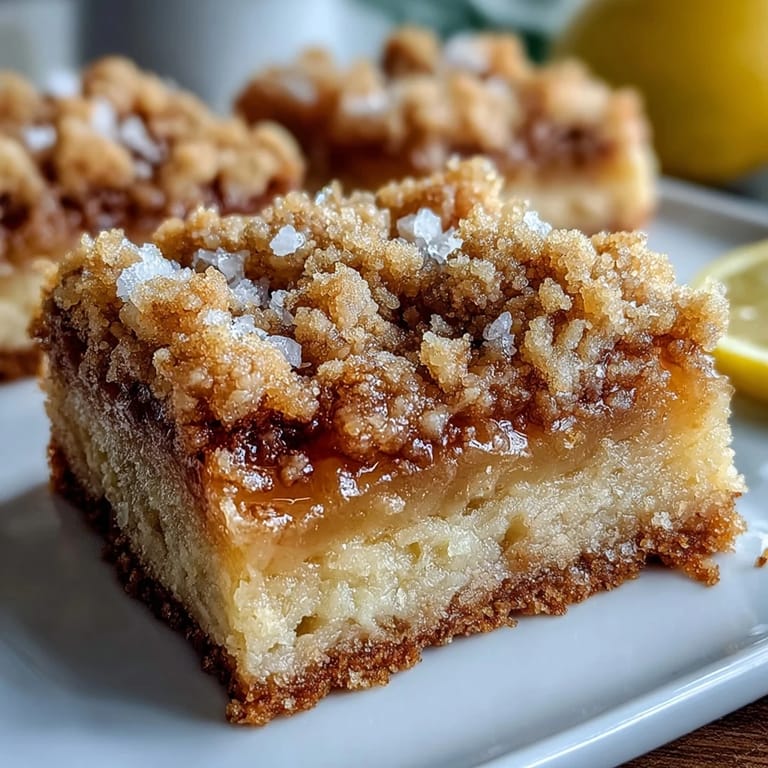
 These lemon bars bridge the gap between casual weeknight treat and special occasion dessert, adaptable to whatever moment needs a little sunshine. Whenever life hands you lemons, skip the lemonade and make these bars instead—your future self will thank you.
Common Recipe Questions
- → How long should I chill the bars before slicing?
Allow the bars to cool in the pan for at least 1 hour after baking, then refrigerate for an additional hour before slicing. Proper chilling ensures clean cuts and prevents the filling from oozing out.
- → Can I use bottled lemon juice instead of fresh?
Fresh lemon juice provides the brightest, most authentic citrus flavor. Bottled juice can work in a pinch, but may result in a slightly more muted taste. For the best results, use fresh lemons and zest to capture those aromatic oils.
- → Why did my filling turn out runny?
Runny filling typically means underbaking or insufficient chilling time. Ensure the oven temperature is accurate and bake for the full 20-25 minutes until the filling is set. Refrigeration is crucial for proper texture development.
- → Can I make these ahead of time?
Absolutely! These bars actually improve after a day in the refrigerator as flavors meld together. Store in an airtight container for up to one week. The texture remains perfectly tender and the crumb topping stays delightfully crunchy.
- → What's the best way to get clean cuts?
Chilling is key—refrigerate for at least 2 hours total. Use a sharp knife wiped clean between cuts, or dip the knife in hot water and dry it before slicing. For extra precision, lift the entire batch out using parchment paper edges before cutting.
- → Can I substitute lime for lemon?
Yes! Lime creates a fun variation with a slightly different citrus profile. Use fresh lime juice and zest in equal amounts. The flavor will be more tropical and tart, while still maintaining that lovely balance with the buttery crumb topping.