 Save to Pinterest
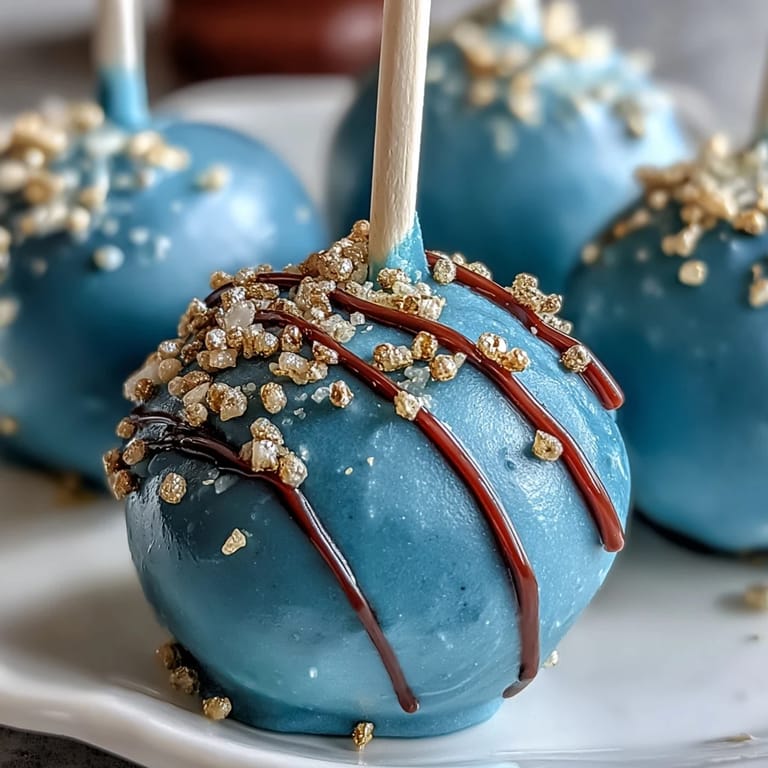
 My nephew's graduation party was coming up fast, and I wanted something that screamed celebration without requiring me to pipe intricate designs on a full sheet cake. That's when cake pops hit different—they're basically tiny edible confetti you can hold in your hand. I grabbed his school colors, some gold sprinkles, and suddenly I was making twenty-four little spheres of pure joy that actually looked fancy enough to impress his entire graduating class.
Standing in my kitchen two days before the party, I was mid-roll when my sister texted asking what I was making. I held up a slightly lopsided cake ball and she laughed so hard through FaceTime that I almost dropped the whole batch. By the time everyone bit into those things at the party, nobody cared that some were rounder than others—they just tasted like celebration and looked like they belonged in a fancy bakery case.
Ingredients
- 1 box vanilla or chocolate cake mix (plus eggs, oil, water as listed on box): Using a mix saves time and guarantees consistent results—no need to stress over scratch baking when you're juggling twenty-four pops.
- 1/2 cup unsalted butter, softened: Make sure it's truly soft so it creams smoothly; cold butter will clump and you'll end up over-mixing the frosting.
- 1 1/2 cups powdered sugar: Sift it if you have time to avoid lumps that can make your frosting grainy instead of fluffy.
- 1 tablespoon milk: This loosens the frosting just enough to bind with the cake crumbs; too little and it won't hold together.
- 1 teaspoon vanilla extract: The subtle flavor lifts the entire pop and keeps it from tasting one-dimensional.
- Pinch of salt: Never skip this—it balances sweetness and makes everything taste more refined.
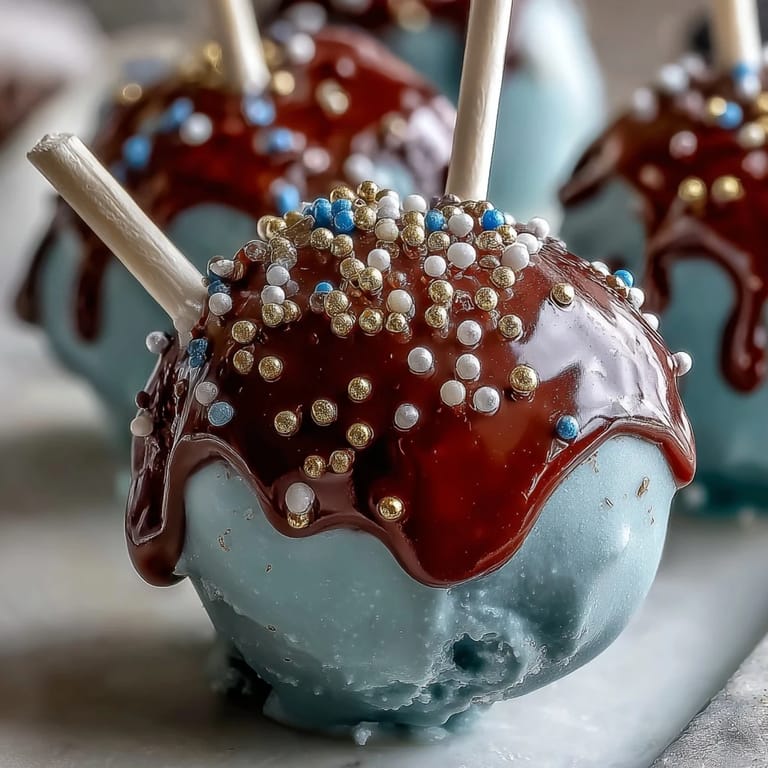
- 450 g candy melts in two school colors: Candy melts are forgiving and set faster than real chocolate; if you go for chocolate coating, it requires tempering and patience you might not have.
- 2 tablespoons vegetable shortening or coconut oil: This thins the candy melts to a dippable consistency and prevents a thick, waxy shell.
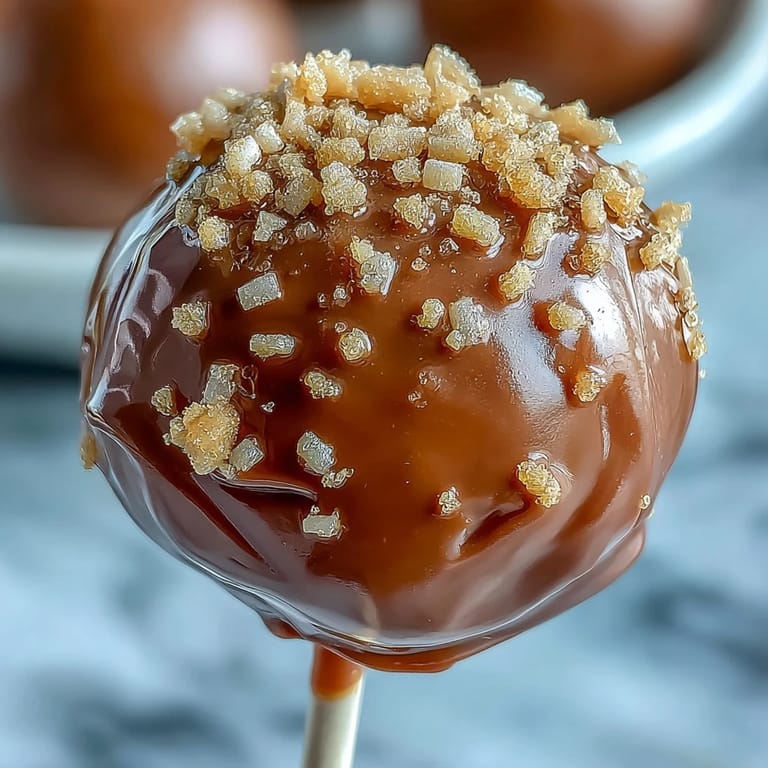
- Gold sprinkles or edible gold glitter: Apply while the coating is still wet or the sprinkles won't stick; dry pops become slippery and the sprinkles just fall off.
- 24 lollipop sticks: Pre-count them so you're not scrambling halfway through and realizing you're short.
- Styrofoam block: This is non-negotiable for drying; it holds each pop upright while the coating sets without getting messy.
Tired of Takeout? 🥡
Get 10 meals you can make faster than delivery arrives. Seriously.
One email. No spam. Unsubscribe anytime.
Instructions
- Bake Your Foundation:
- Follow the box instructions and let the cake cool completely in the pan—I learned this the hard way when I tried to crumble warm cake and ended up with mushy clumps instead of fine crumbs. Patience here matters more than you'd think.
- Whip the Frosting:
- Beat the softened butter until it's pale and fluffy, about two minutes, then gradually add the powdered sugar so it incorporates smoothly without flying everywhere. Add milk, vanilla, and salt and beat until it looks like clouds in a bowl.
- Combine Cake and Frosting:
- Crumble the cooled cake into a large bowl and start mixing in frosting a little at a time—think of it like making cookie dough. You want it to hold together when squeezed but still feel slightly crumbly, not dense or wet like actual frosting.
- Roll Into Balls:
- Using a tablespoon measure or small cookie scoop keeps the sizes consistent so they all look polished together. Roll each one between your palms gently; rough handling tears the surface and they won't look smooth after dipping.
- Chill and Firm Up:
- Refrigerate for at least an hour (or freeze for thirty minutes if you're impatient like me). This keeps them from falling apart when you dip them into warm candy melts.
- Anchor the Sticks:
- Dip each stick's end into melted candy, then push it halfway into a cake ball—this adhesive keeps the stick from spinning and falling out when you're dunking it. Let these set for a minute before moving on.
- Dip with Confidence:
- Melt your candy melts in separate bowls and add a little shortening to thin them out so they coat smoothly without clumping. Hold the stick and gently rotate the pop in the warm candy, then tap off excess against the bowl's edge so you don't end up with a thick dripping shell.
- Sparkle While Wet:
- This is critical—sprinkle the gold while the candy coating is still soft and tacky, not after it hardens. The sprinkles stick because of that moisture, so move fast but without panic.
- Set Upright and Chill:
- Stick each pop into the Styrofoam block and let everything harden at room temperature, which usually takes twenty to thirty minutes. Resist the urge to touch them or move them around; let them be.
 Save to Pinterest
 My neighbor stopped by while I was finishing the last batch and grabbed one still warm from the Styrofoam block. She bit into it and got that glazed, happy expression people get when they taste something that's both pretty and genuinely delicious, and I realized these little pops had somehow become something more than a time-saving dessert idea—they felt like celebration in edible form.
Color Coordination That Actually Works
Picking your school colors is the fun part, but there's strategy involved. If your school colors are light blue and white, dip half the batch in each and they'll look like a coordinated set on a table. Dark colors like navy or maroon look sophisticated and hide any imperfect dipping marks, while bright colors like yellow or orange are bolder and more playful. If one color is white, expect to use more of it because white candy melts need extra coats to look opaque and pretty rather than translucent and dingy.
Troubleshooting When Things Don't Go According to Plan
I once dipped a pop and watched the coating slide right off because the cake ball was too warm from the room temperature. Moving your cakes to a cooler spot or even a quick ten-minute freeze before dipping saves you from the heartbreak of repeated coating sessions. If your candy melts seize up and get thick and grainy, you've likely gotten water in them—start over with a fresh bowl rather than trying to salvage it. Sometimes a stick rotates inside the pop instead of staying firm, which means it wasn't pushed in far enough initially or the frosting-to-cake ratio was off and the ball was too loose.
- Always test-dip one pop before decorating the whole batch so you can adjust your technique.
- Keep candy melts between 88 and 91 degrees Fahrenheit for the smoothest dipping consistency.
- If sprinkles aren't sticking, your coating has already hardened—work faster next time or melt the candy a few degrees warmer.
 Save to Pinterest
 These cake pops are proof that celebration doesn't have to be complicated, just intentional. Wrap them in cellophane with a ribbon, stack them in a box, and you've made something people will actually remember.
Common Recipe Questions
- → How do I ensure the cake balls hold together?
Mix the crumbled cake with frosting gradually, adding just enough to allow the mixture to hold its shape without being too wet or sticky.
- → What is the best way to secure the lollipop sticks?
Dip the end of each stick into melted candy melts before inserting halfway into each ball to ensure they stay firmly in place.
- → Can I use different cake flavors?
Yes, choose any cake flavor you like. Darker cakes can be paired with contrasting candy melts for a bold effect.
- → How do I get a smooth coating on the pops?
Add a small amount of vegetable shortening or coconut oil to the melted candy melts to achieve a smoother dipping consistency.
- → How should I store the finished cake pops?
Store cake pops in an airtight container at room temperature for up to 3 days, or refrigerate them for up to one week.