 Save to Pinterest
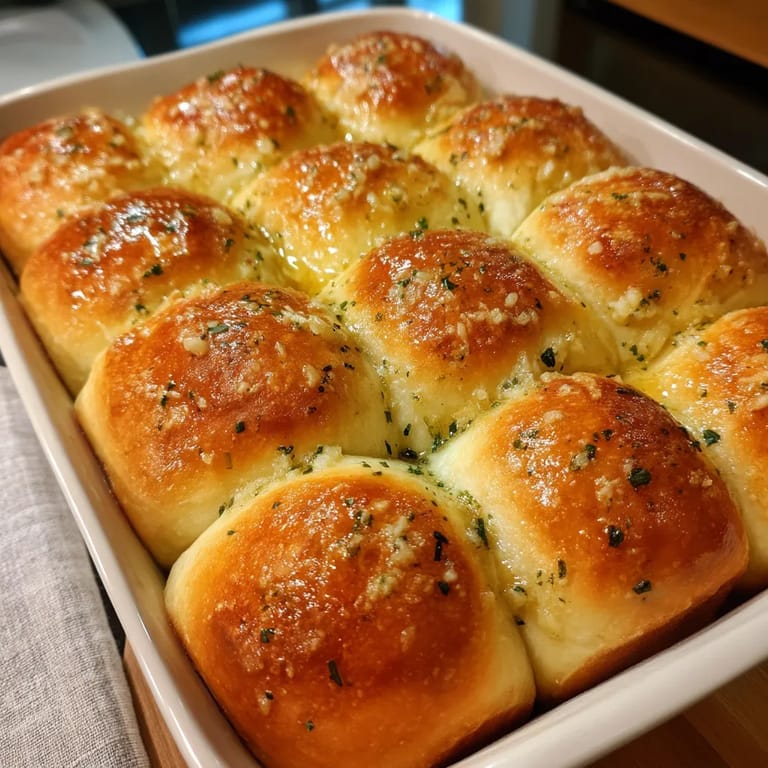
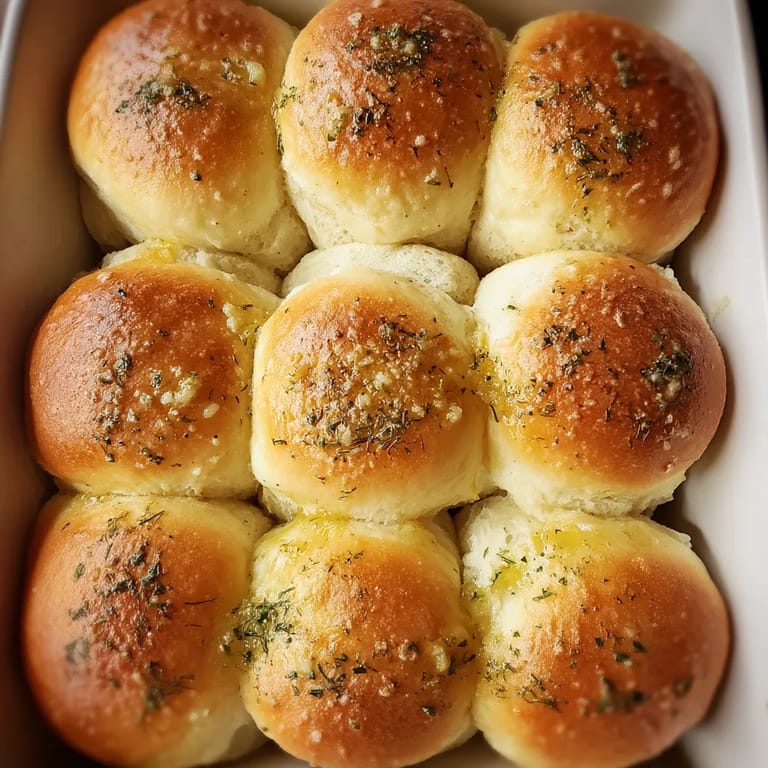
 This recipe for homemade garlic butter dinner rolls transforms any meal from ordinary to extraordinary. These pillowy soft rolls with their glistening garlic butter tops have become my signature contribution to family gatherings and holiday feasts alike. The combination of fresh-baked bread and savory garlic butter creates an irresistible aroma that draws everyone to the table before dinner is even announced.
I first developed this recipe when hosting my first Thanksgiving dinner. Despite all the elaborate dishes I prepared that day, these simple rolls disappeared faster than anything else on the table. Now they're requested at every family gathering, and I've perfected the technique over dozens of batches.
Ingredients
- All purpose flour forms the foundation for these pillowy rolls, providing structure while keeping them tender
- Active dry yeast breathes life into the dough, creating that perfect rise and airy texture
- Granulated sugar feeds the yeast and adds subtle sweetness that balances the savory notes
- Warm milk activates the yeast and creates a softer texture than water would
- Unsalted butter enriches the dough for incredible tenderness and flavor
- Egg provides structure and richness to create that perfect dinner roll texture
- Fresh garlic in the topping delivers aromatic punch that store bought garlic powder simply cannot match
- Fresh parsley adds a pop of color and herbaceous flavor that elevates these rolls to something special
Tired of Takeout? 🥡
Get 10 meals you can make faster than delivery arrives. Seriously.
One email. No spam. Unsubscribe anytime.
Step-by-Step Instructions
- Activate the yeast
- Combine warm milk with sugar and yeast in a small bowl, stirring gently. Allow it to sit undisturbed for 5 to 10 minutes until frothy and fragrant. This step ensures your yeast is alive and active before proceeding with the recipe.
- Create the dough base
- In a large mixing bowl, whisk together flour and salt, then add your activated yeast mixture, melted butter, and egg. Mix until a shaggy dough forms, making sure to incorporate all dry ingredients. The dough will look rough at this stage, which is perfectly normal.
- Develop the gluten
- Transfer dough to a lightly floured surface and knead vigorously for 8 to 10 minutes until smooth and elastic. The dough should bounce back when poked with your finger and feel slightly tacky but not sticky. This kneading process develops the gluten structure that gives your rolls their perfect texture.
- First rise
- Place the kneaded dough in a greased bowl, turning once to coat all sides with oil. Cover with a clean kitchen towel or plastic wrap and place in a warm, draft free area. Allow to rise until doubled in size, approximately one hour. The dough should look puffy and expanded, and when you gently poke it with your finger, the indentation should remain.
- Shape the rolls
- Gently punch down the risen dough to release excess air bubbles. Divide into 12 equal portions using a bench scraper or knife. Shape each portion into a ball by tucking the edges underneath and rolling between your palms until smooth. Place in a greased 9x13 inch baking dish with slight spacing between each roll.
- Second rise
- Cover the shaped rolls and allow them to rise again until puffy and nearly doubled, about 30 minutes. This shorter second rise gives the rolls their final lift and ensures a light, airy texture. They should expand to touch each other slightly in the pan.
- Bake to golden perfection
- Bake in a preheated 375°F oven for 18 to 20 minutes until the tops are golden brown and the internal temperature reaches 190°F. The rolls should sound hollow when tapped on the bottom if fully baked.
- Apply garlic butter magic
- While the rolls bake, prepare the garlic butter by melting butter and stirring in minced garlic and chopped parsley. The warm butter will slightly cook the garlic, taking away the raw bite while infusing the butter with flavor. Brush generously over the hot rolls immediately after they come out of the oven, allowing the butter to melt into every crevice.
 Save to Pinterest
 The garlic butter is truly what makes these rolls exceptional. I discovered this technique from my grandmother, who always said bread is merely a vehicle for butter. She would mince her garlic by hand rather than using a press, claiming it released more oils and flavor. Every time I make these rolls, I think of her teaching me to bake in her tiny kitchen with flour covering every surface.
Make Ahead Options
These versatile rolls can fit into even the busiest schedule. For same day service, complete the recipe as written. For overnight preparation, make the dough and place it in the refrigerator after the first rise. The cool temperature slows yeast activity, allowing for a long, slow fermentation that actually develops more complex flavors. The next day, remove from refrigerator about an hour before shaping to allow the dough to warm slightly. Then proceed with shaping, second rise, and baking. This method actually produces an even better flavor profile.
Troubleshooting Tips
Achieving perfect dinner rolls can sometimes be challenging, especially for bread beginners. If your dough seems too sticky during kneading, resist adding too much additional flour which can make rolls dense. Instead, use a light dusting and keep working the dough as it will become less sticky as gluten develops. If your rolls aren't rising properly, check that your kitchen isn't too cold and that your yeast is fresh. Creating a warm environment by preheating your oven for just a minute then turning it off before placing the covered dough inside works wonderfully for rising in colder homes.
Serving Suggestions
These garlic butter rolls pair beautifully with almost any meal, but they truly shine alongside pasta dishes, roasted meats, and hearty soups. Try them with lasagna where they can soak up rich tomato sauce, or alongside a holiday turkey dinner. For an elevated appetizer, split leftover rolls and top with a mixture of ricotta, herbs, and a drizzle of honey. I often serve these at Sunday family dinners where they're placed directly on the table in their baking dish, family style, with extra butter on the side for those who want an additional slather.
Save to Pinterest Common Recipe Questions
- → Can I make these dinner rolls ahead of time?
Yes! The dough can be made a day ahead - simply cover and refrigerate after the first rise, then bring to room temperature before shaping into rolls. Alternatively, the fully baked rolls freeze well for up to 2 months. To serve, thaw, reheat, and brush with fresh garlic butter.
- → How do I know when the dough has risen enough?
The dough should approximately double in size during the first rise (about 1 hour). During the second rise after shaping, the rolls should look noticeably puffy (about 30 minutes). A good test is to gently press a finger into the dough - if it springs back slowly and leaves a small indentation, it's ready.
- → Can I make these rolls without a stand mixer?
Absolutely! While a stand mixer with a dough hook makes the process easier (5-6 minutes of kneading), you can mix the dough by hand and knead on a lightly floured surface for 8-10 minutes until smooth and elastic.
- → How can I adapt these rolls for dietary restrictions?
For dairy-free rolls, substitute the milk with plant-based milk and use dairy-free butter. For egg-free versions, use an egg replacer. Be aware that texture may vary slightly with substitutions, but the rolls will still be delicious.
- → What's the best way to reheat leftover dinner rolls?
For the best texture, wrap leftover rolls in foil and heat in a 300°F oven for about 10 minutes until warmed through. Microwave reheating works in a pinch (15-20 seconds), but may result in a slightly chewier texture. For extra flavor, brush with fresh garlic butter after reheating.
- → How do I know when the rolls are fully baked?
The rolls should be golden brown on top and sound hollow when tapped on the bottom. An instant-read thermometer inserted into the center of a roll should read around 190°F when fully baked. If tops are browning too quickly, cover loosely with foil during the final minutes of baking.