 Save to Pinterest
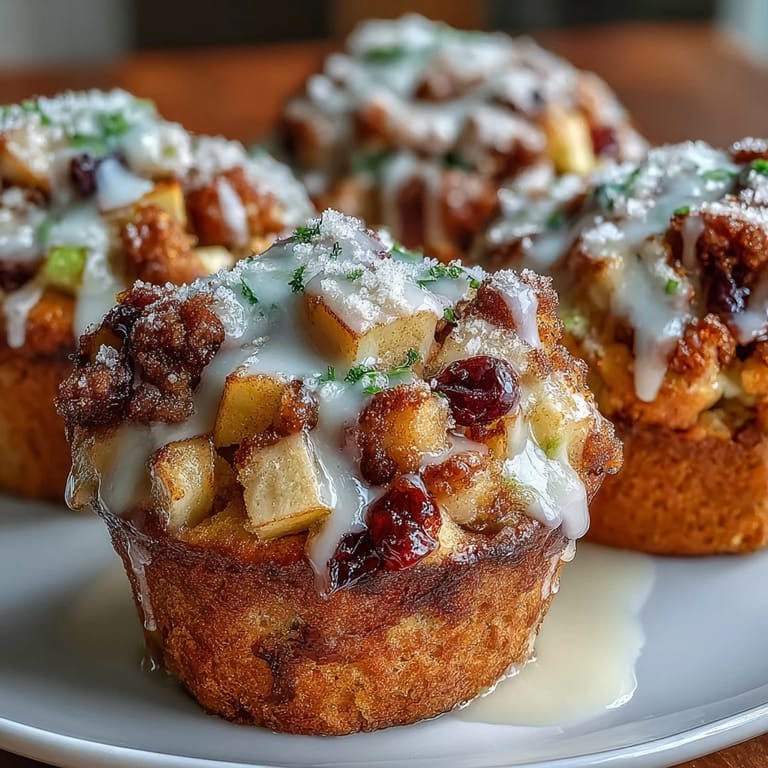
 My neighbor stopped by one October morning with a bag of apples from her orchard, and I found myself staring at them, wondering what to do beyond the usual pie. That same afternoon, I caught the scent of cinnamon wafting from someone's kitchen down the street, and it clicked—apple fritters, but in muffin form, something you could grab without the grease. The first batch came out golden and tender, with pockets of soft apple throughout, and by the time I'd drizzled the glaze, I knew these would become a regular thing in my rotation.
I brought a batch to my book club, and my friend Sarah, who's usually skeptical about anything homemade, took one bite and immediately asked for the recipe—then asked for three more muffins to take home. There's something about that moment when you see someone's face light up that makes all the mixing and measuring feel worthwhile.
Ingredients
- Apples (2 large, Granny Smith or Honeycrisp): Peel, core, and dice them into bite-sized pieces; Granny Smith gives you tartness to balance the sweetness, while Honeycrisp adds juicy tenderness, so pick based on your mood.
- All-purpose flour (2 cups): This is your base, and measuring by weight is ideal, but if you're using cups, spoon and level rather than scooping directly from the bag.
- Brown sugar (3/4 cup, packed): Brown sugar brings moisture and a subtle molasses depth that regular sugar can't match, and pressing it into your measuring cup makes a real difference in the final texture.
- Baking powder (2 teaspoons): This is what lifts these muffins into tender, fluffy territory, so make sure yours isn't sitting in the back of your cupboard expired.
- Ground cinnamon (1 1/2 teaspoons): Don't skimp here—cinnamon is the soul of these muffins, and fresh cinnamon from a tin you've actually opened recently tastes noticeably better.
- Salt (1/2 teaspoon): A pinch of salt heightens all the other flavors and keeps the sweetness from feeling one-dimensional.
- Eggs (2 large): Room temperature eggs blend more smoothly with the other wet ingredients, so pull them out of the fridge a few minutes before you start mixing.
- Milk (1/2 cup plus 1–2 tablespoons for glaze): Whole milk gives you the richest crumb, though 2% works just fine if that's what you have.
- Unsalted butter (1/4 cup, melted): Melted butter distributes evenly through the batter and keeps these muffins moist for days, so don't skip this step or substitute oil.
- Vanilla extract (1 teaspoon): Real vanilla makes a noticeable difference; use the good stuff if you can.
- Powdered sugar (2 tablespoons): This creates that final sweet finish that makes them feel special, and sifting it first prevents lumpy spots in your glaze.
Tired of Takeout? 🥡
Get 10 meals you can make faster than delivery arrives. Seriously.
One email. No spam. Unsubscribe anytime.
Instructions
- Heat your oven and prep:
- Preheat to 350°F and grease your 12-cup muffin tin or line it with paper liners; this step matters more than it sounds because it prevents sticking and lets you focus on the good part later.
- Build your dry mix:
- Whisk together flour, brown sugar, baking powder, cinnamon, and salt in a large bowl, taking a moment to make sure everything is evenly distributed because lumps of baking powder create bitter spots.
- Combine the wet team:
- In a separate bowl, whisk eggs, milk, melted butter, and vanilla until they're well combined and slightly frothy, which means the eggs are doing their job of binding everything together.
- Bring it together gently:
- Pour wet into dry and fold with a rubber spatula using broad, sweeping motions until just combined—this is where patience pays off, because overmixing toughens the muffins and nobody wants that. Stop mixing while you can still see a few streaks of flour.
- Fold in the apples:
- Add the diced apples and fold gently until they're distributed throughout, being careful not to crush them into applesauce as you work.
- Fill the muffin cups:
- Divide batter evenly among the prepared cups, filling each about 2/3 full; I use a small ice cream scoop to keep portions consistent and make the muffins bake evenly.
- Bake with confidence:
- Bake for 20–25 minutes, until a toothpick inserted into the center comes out clean with just a few moist crumbs clinging to it; the kitchen will smell incredible and that's when you know you're close.
- Cool strategically:
- Let muffins rest in the pan for 5 minutes (they need this time to set), then turn them out onto a wire rack to cool completely, which prevents that sweaty, soggy bottom that happens when they cool in the pan.
- Make the glaze:
- Whisk powdered sugar with 1 tablespoon milk, then add more milk a tiny bit at a time until you reach a consistency that flows off your spoon but still coats the muffin tops.
- The final touch:
- Drizzle glaze over completely cooled muffins using a fork or small spoon, letting it pool slightly on top for that bakery-quality finish.
 Save to Pinterest
 My daughter asked me to make these every week for her lunch box, which tells you everything you need to know about how they taste. Now they're one of those recipes I make without thinking, the kind that turns an ordinary morning into something just a little bit special.
Storage and Make-Ahead Magic
These muffins are forgiving in the best way—they stay tender and moist in an airtight container at room temperature for three full days, which means you can make them on Sunday and eat well into the week. I've also frozen them unfrozen and unbaked, then thawed them when needed, though I find they taste best when freshly made or stored within those first few days.
Flavor Variations That Work
Once you nail the basic recipe, the fun part begins. I've added a pinch of nutmeg for extra warmth on chilly mornings, stirred in chopped toasted walnuts for crunch when I want something more substantial, and even experimented with a cream-based glaze instead of milk, which tastes almost sinfully rich. The base recipe is so solid that it welcomes these additions without losing its identity.
The Details That Really Matter
Small things make a surprising difference here—using brown sugar instead of white creates a moister crumb that stays soft longer, and room-temperature eggs blend more smoothly with the other wet ingredients. The melted butter matters too; it coats the flour particles evenly and keeps these muffins tender even on day three, which is why I never skip it or try to substitute oil. A final thought: don't let a toothpick come out completely clean; a few moist crumbs clinging to it means the muffins will stay tender as they cool, while a completely clean toothpick sometimes means they've baked a touch too long.
- Measure brown sugar by packing it firmly into your measuring cup for consistency.
- If your apples are very watery, pat them dry with paper towels before folding them in.
- The glaze works best when drizzled over completely cooled muffins so it sets into a nice shell.
 Save to Pinterest
 These muffins have become my answer to that 3 p.m. slump or the last-minute breakfast when guests drop by unexpectedly. They're proof that simple, honest food made with a little care tastes better than anything fancy.
Common Recipe Questions
- → Can I use different types of apples?
Yes, Granny Smith and Honeycrisp are recommended for their balance of tartness and sweetness, but you can use any firm apple variety like Braeburn, Fuji, or Gala. Softer apples may break down more during baking.
- → How do I store these muffins?
Store cooled muffins in an airtight container at room temperature for up to 3 days. For longer storage, freeze unglazed muffins in a freezer-safe bag for up to 3 months. Thaw at room temperature and add glaze before serving.
- → Can I make these without the glaze?
Absolutely. The muffins are delicious on their own with the apple chunks and cinnamon-sugar flavors. You can also brush them with melted butter and roll in cinnamon sugar while warm for a different finish.
- → Why is my batter thick?
The batter should be thick to support the apple chunks and prevent them from sinking to the bottom. If it seems overly stiff, add one tablespoon of milk at a time until it reaches a scoopable consistency.
- → Can I add nuts or other mix-ins?
Yes, chopped walnuts or pecans add wonderful crunch and complement the apple flavors. You can also add 1/4 cup raisins or dried cranberries. Keep total add-ins to 1 cup to maintain the proper batter ratio.
- → How do I know when the muffins are done?
Insert a toothpick into the center of a muffin—if it comes out clean or with just a few moist crumbs, they're ready. The tops should be golden brown and spring back lightly when touched. Begin checking at 20 minutes.