 Save to Pinterest
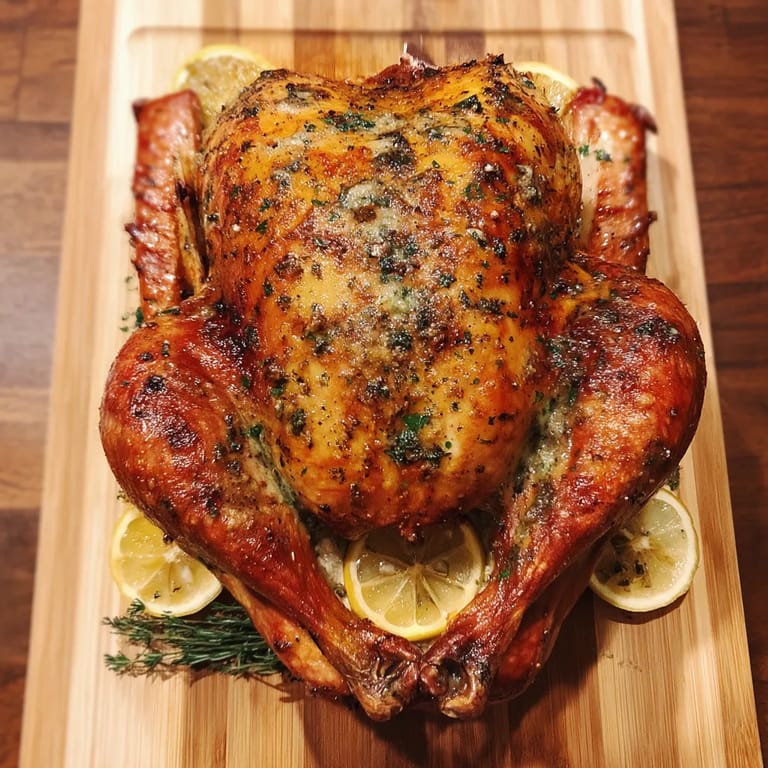
 This succulent herb-buttered roast turkey has been the star of our family holidays for generations. The aromatic herbs infuse into every bite, creating a turkey that's golden on the outside and incredibly juicy on the inside. The simple yet effective technique of slipping herb butter under the skin makes all the difference between an ordinary turkey and an extraordinary centerpiece.
I first made this recipe when I was hosting my first Thanksgiving as a newlywed. I was terrified of serving a dry turkey, but this method saved me. Now fifteen years later, my extended family still requests "my" special turkey, and I've never revealed how simple it actually is to achieve these results.
Ingredients
- 1 whole turkey 12 to 14 pounds Choose a fresh turkey when possible for best flavor and texture. If using frozen, ensure it's completely thawed which takes about 3 days in the refrigerator
- 1 cup unsalted butter softened The foundation of flavor. Use high-quality butter as it will significantly impact the final taste
- Fresh herbs rosemary, thyme, sage These classic poultry herbs create the signature aroma and flavor. Fresh herbs make a noticeable difference compared to dried
- Garlic cloves Adds depth and savory notes that complement the herbs perfectly
- Salt and pepper Essential for bringing out all the other flavors. Kosher salt works best for even distribution
- Lemon and onion These aromatic additions inside the cavity perfume the meat from within while cooking
- Chicken or turkey broth Creates steam in the roasting environment for moist meat and provides liquid for basting
- Optional apple and extra herbs for cavity These add subtle sweetness and additional aroma that permeates throughout the meat
Tired of Takeout? 🥡
Get 10 meals you can make faster than delivery arrives. Seriously.
One email. No spam. Unsubscribe anytime.
Step-by-Step Instructions
- Prepare the Turkey
- Remove the turkey from refrigeration about an hour before cooking to take the chill off. This promotes even cooking. Thoroughly pat the entire bird dry inside and out with paper towels. A dry surface is absolutely crucial for achieving that coveted golden brown skin. Remove the giblets and neck from the cavity, saving them for gravy if desired.
- Create the Herb Butter
- Mix the softened butter thoroughly with the chopped herbs, minced garlic, salt, and pepper until completely combined. The butter should be very soft but not melted, which makes it easier to spread. Take your time working the herbs evenly throughout the butter to ensure consistent flavor in every bite.
- Apply the Butter
- This step requires patience but delivers tremendous flavor. Gently slide your fingers between the skin and meat, carefully separating them without tearing the skin. Work slowly, creating a pocket over the entire breast area. Take generous amounts of herb butter and push it into these pockets, massaging from the outside to distribute it evenly under the skin. Then thoroughly coat the entire outside of the turkey with the remaining butter, ensuring every inch is covered.
- Flavor the Cavity
- Insert lemon halves, onion quarters, and if using, apple pieces and additional herb sprigs into the main cavity. Do not overstuff as this can impede proper heat circulation. These aromatics will release moisture and fragrance throughout the cooking process, flavoring the meat from within.
- Position and Roast
- Place the turkey breast side up on a rack in your roasting pan. The rack is crucial for allowing heat to circulate completely around the bird. Pour broth into the bottom of the pan. This creates steam during cooking and prevents drippings from burning. Tent loosely with foil to prevent the skin from browning too quickly.
- Monitor and Baste
- Roast at 325°F, calculating approximately 15 minutes per pound. Set a timer to remind yourself to baste every 45 minutes. Basting involves carefully spooning the pan juices over the entire turkey, which adds flavor and moisture. Remove the foil during the final 45 minutes to allow the skin to reach a deep golden brown.
- Check Temperature
- The only reliable way to know your turkey is done is with a meat thermometer inserted into the thickest part of the thigh without touching bone. The temperature should read 165°F. If you notice the breast browning too quickly while the turkey is still cooking, place a small piece of foil just over the breast area.
- Rest Before Carving
- This step is non-negotiable. Transfer the turkey to a cutting board, tent loosely with foil, and allow it to rest for a full 30 minutes. During this time, the juices redistribute throughout the meat. Carving too early results in dry turkey and lost juices.
 Save to Pinterest
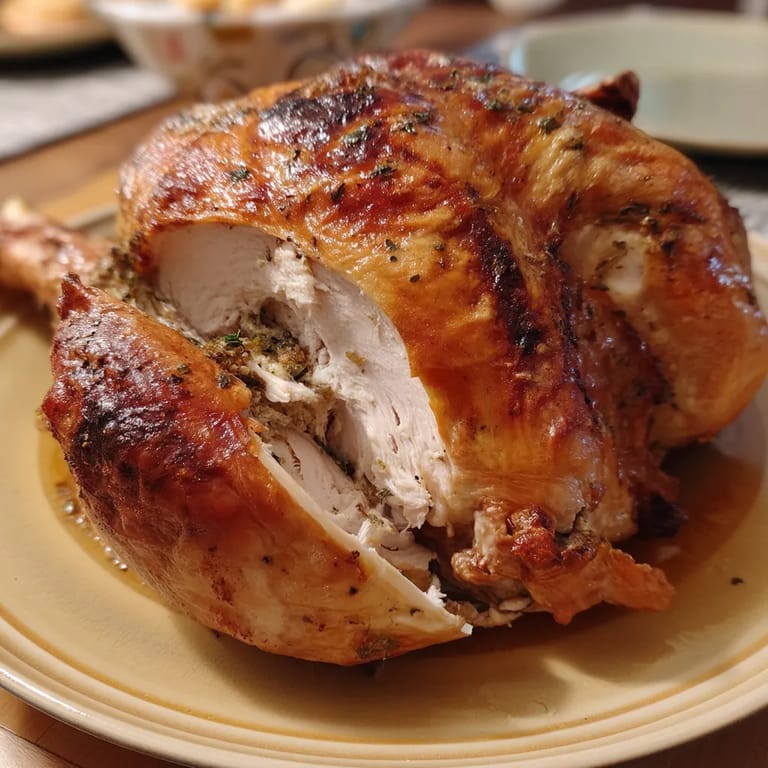
 My grandmother taught me to always place a few tablespoons of herb butter in the cavity as well, claiming it helped flavor the dark meat from the inside. Whether scientifically sound or not, I continue this tradition because every turkey I make this way turns out perfect, and sometimes kitchen wisdom transcends explanation.
Make-Ahead Options
The herb butter can be prepared up to three days in advance and stored covered in the refrigerator. This significantly reduces day-of prep time. You can even butter the turkey the night before cooking, leaving it uncovered in the refrigerator overnight. This creates a dry environment that will help the skin become extra crispy during roasting. If your refrigerator space allows, this technique makes the morning of your feast much more manageable.
Troubleshooting Tips
If your turkey browns too quickly, fashion a foil shield just for the breast area while allowing the rest of the bird to continue browning. This protective cover prevents overcooking the white meat while allowing the dark meat to reach proper temperature. Conversely, if your turkey is fully cooked but the skin lacks color, a quick 10-minute blast under the broiler can add beautiful golden color, but watch it carefully to prevent burning.
Serving Suggestions
This herb-buttered turkey pairs beautifully with traditional sides like cranberry sauce, which provides tart contrast to the rich meat. For wine pairings, a medium-bodied Pinot Noir complements without overwhelming the herb flavors. Consider carving the turkey in the kitchen rather than at the table, as this allows you to arrange the slices attractively and keep them moistened with a spoonful of hot broth before serving.
Save to Pinterest Common Recipe Questions
- → How do I know when my turkey is fully cooked?
Your turkey is fully cooked when a meat thermometer inserted into the thickest part of the thigh (without touching bone) reads 165°F (74°C). The juices should run clear, not pink, when you pierce the meat. Always use a thermometer rather than relying on cooking time alone, as oven temperatures and turkey sizes vary.
- → Why should I let the turkey rest before carving?
Resting the turkey for 30 minutes allows the juices to redistribute throughout the meat. If you carve immediately after removing from the oven, these flavorful juices will run out onto your cutting board, resulting in drier meat. The resting period ensures your turkey stays moist and juicy when served.
- → Can I prepare the herb butter in advance?
Yes! The herb butter can be prepared up to 3 days in advance and stored in the refrigerator. Just bring it to room temperature before using so it's soft enough to spread under and over the turkey skin. This advance preparation saves time on cooking day.
- → How do I prevent the turkey skin from burning?
Tent the turkey loosely with aluminum foil for most of the cooking time, removing it only for the final 45 minutes to allow the skin to brown. If you notice any areas browning too quickly during that final phase, you can cover just those sections with small pieces of foil while allowing the rest to continue browning.
- → What's the best way to thaw a frozen turkey?
The safest method is to thaw your turkey in the refrigerator, allowing approximately 24 hours for every 4-5 pounds of turkey. For a 12-14 pound turkey, that means starting the thawing process 3-4 days before cooking. Always place the turkey in a container to catch any juices and prevent cross-contamination.
- → Can I stuff this turkey with traditional bread stuffing?
Yes, but it will increase cooking time and requires careful temperature monitoring. For food safety, the center of the stuffing must reach 165°F. Many chefs prefer to cook stuffing separately (as 'dressing') for more even cooking of both components and to minimize food safety concerns.