 Save to Pinterest
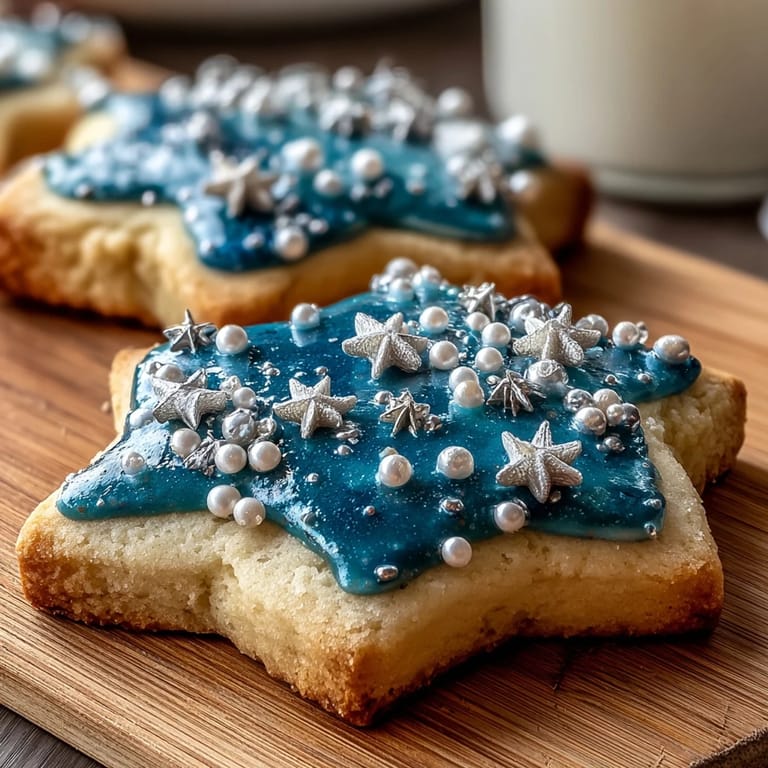
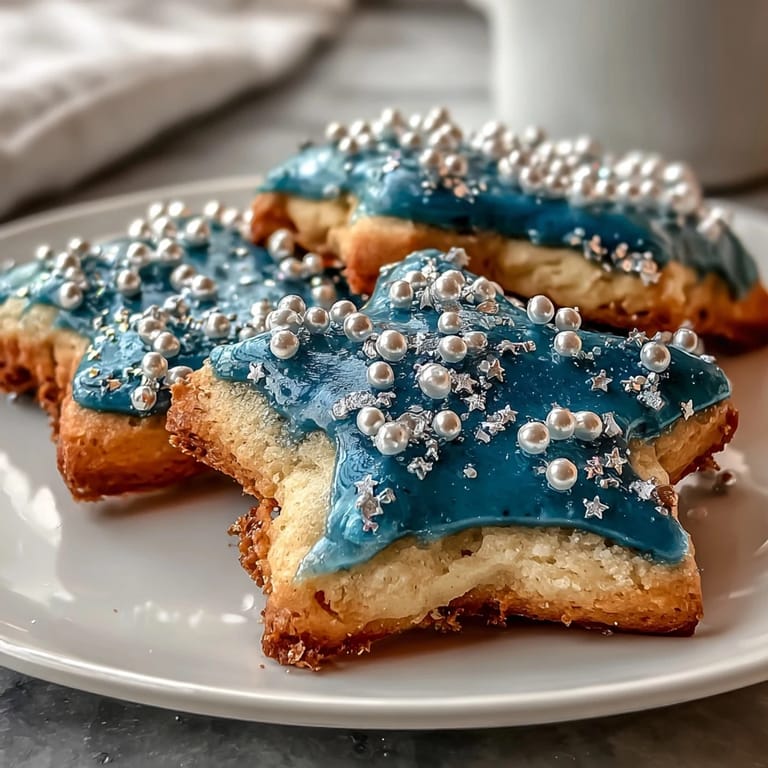
 My friend Sarah showed up to my kitchen one rainy afternoon with a printout of her birth chart, convinced that baking something under her zodiac sign would bring good luck. She's a Pisces, naturally, and instead of rolling my eyes, I found myself pulling out flour and butter, determined to make her something special. These sugar cookies emerged from that spontaneous afternoon, delicate and starry, decorated with constellation patterns that turned out far better than I expected. Now whenever I make them, that afternoon feels like it's baked right into every bite.
I baked a batch for Sarah's birthday dinner, and watching her face light up when she saw the cookies arranged on the dessert table made all the precision work worth it. Her mom, who'd never heard of edible glitter before, kept examining them under different lighting to see how they shimmered. That's when I realized these cookies had become something more than dessert—they were tiny edible art pieces that sparked joy just by existing on the table.
Ingredients
- All-purpose flour (2 1/4 cups): The foundation that makes these cookies tender rather than tough, and measuring by weight instead of volume keeps them consistent every single time.
- Unsalted butter (3/4 cup, softened): Softness matters here because it creams with sugar into a fluffy base that gives these cookies their delicate texture.
- Granulated sugar (3/4 cup): This sweetness balances beautifully with the vanilla, and beating it into the butter until pale is the secret to cookies that spread just right.
- Baking powder (1/2 teaspoon): A gentle lift, nothing aggressive—we want tender cookies, not cakey ones.
- Salt (1/4 teaspoon): Even a whisper of salt brightens the vanilla flavor in ways that feel almost magical.
- Egg (1 large): The binder that holds everything together while adding richness without heaviness.
- Pure vanilla extract (2 teaspoons): Use real vanilla, not imitation, because you can taste the difference in these simple cookies.
- Powdered sugar (1 1/2 cups, sifted): Sift it before measuring to avoid lumps that ruin smooth icing.
- Milk (2–3 tablespoons): Start with 2 and add more if your icing needs thinning; every kitchen has different humidity.
- Blue or navy gel food coloring: Gel holds color better than liquid coloring and won't thin out your icing.
- Edible silver or gold star sprinkles: These are the sparkle that makes the cookies feel celebratory.
- Edible silver pearls or gold dragees: These become your constellation points and catch the light beautifully.
- Edible glitter (optional): A tiny dusting makes them shimmer like actual stars.
Tired of Takeout? 🥡
Get 10 meals you can make faster than delivery arrives. Seriously.
One email. No spam. Unsubscribe anytime.
Instructions
- Gather and prepare:
- Whisk together flour, baking powder, and salt in a bowl and set it aside so you're ready to go when you need it. This little bit of prep prevents lumps from forming when you add the dry ingredients to the wet.
- Cream the butter and sugar:
- Beat your softened butter and sugar together in a large bowl until the mixture looks pale, fluffy, and lighter than when you started—this takes about 2 minutes with an electric mixer. You're aerating the mixture, which is what gives these cookies their tender crumb.
- Add the egg and vanilla:
- Mix in your egg and vanilla extract, scraping down the sides of the bowl to make sure everything is evenly combined. The mixture should look smooth and creamy at this point.
- Bring the dough together:
- Gradually add your dry ingredients to the wet mixture, stirring just until a soft dough forms without any visible flour streaks. Overmixing at this stage leads to tough cookies, so stop as soon as everything is combined.
- Chill the dough:
- Divide your dough in half, flatten each piece into a disk, wrap them in plastic wrap, and refrigerate for 30 minutes. Cold dough is easier to roll and cuts cleaner shapes.
- Heat and prepare:
- Preheat your oven to 350°F (175°C) and line baking sheets with parchment paper while the dough chills. This prevents sticking and ensures even browning on the bottom.
- Roll and cut:
- On a lightly floured surface, roll your chilled dough to about 1/4 inch thick and cut out circles or star shapes using cookie cutters. If the dough gets too warm, pop it back in the fridge for a few minutes.
- Space them out:
- Arrange cookies about 1 inch apart on your prepared baking sheets because they'll spread slightly as they bake. Even spacing means even baking.
- Bake until golden:
- Bake for 10–12 minutes, watching until the edges just turn golden while the centers stay pale. They'll continue to firm up as they cool, so don't overbake.
- Cool completely:
- Let cookies sit on the baking sheet for a few minutes, then transfer to a wire rack to cool all the way down before decorating. Warm cookies will melt your icing.
- Make the icing smooth:
- Mix powdered sugar, 2 tablespoons of milk, and vanilla extract until smooth and spreadable, adding a bit more milk if needed. The consistency should flow easily without being runny.
- Tint with color:
- Add blue or navy gel food coloring a tiny bit at a time, stirring thoroughly between additions so you get the shade you want. Gel coloring is concentrated, so a little goes a long way.
- Spread the base:
- Using a piping bag or the back of a spatula, spread or pipe a thin layer of icing onto each cooled cookie. Work while the icing is still wet so you can place your constellation points before it sets.
- Map the constellation:
- While the icing is still wet, arrange your edible pearls or dragees to form the Pisces constellation using a reference image as your guide. The two fish connected by a cord is the classic pattern.
- Add the star sprinkles:
- Scatter your star-shaped sprinkles around the constellation and across the cookie for extra sparkle and visual interest. A light touch makes it look intentional rather than chaotic.
- Dust with glitter:
- If you're using edible glitter, sprinkle it lightly over the wet icing for a final touch of shimmer. Let everything set completely before serving.
 Save to Pinterest
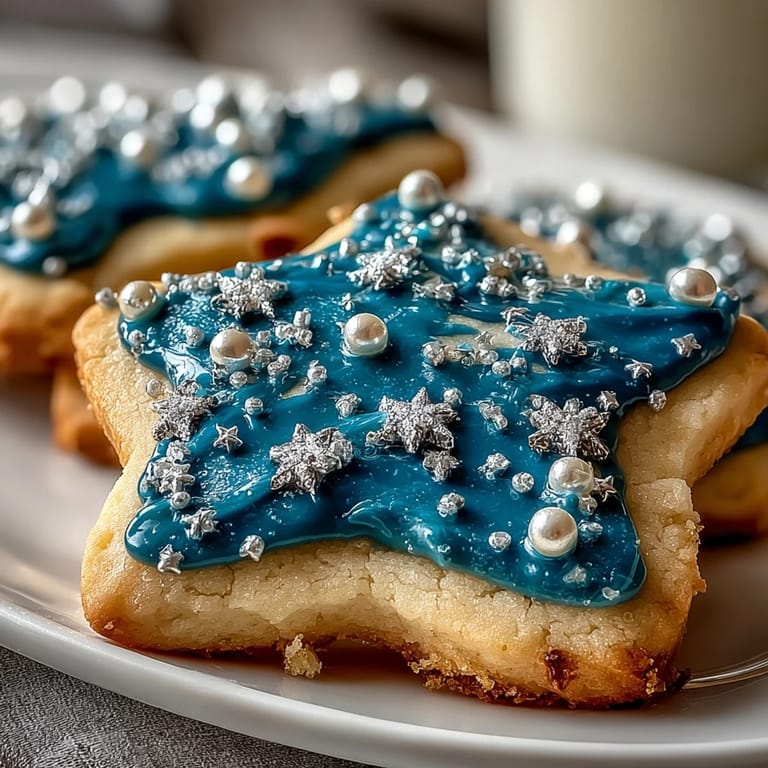
 I made these cookies for a coworker's retirement party, and the birthday girl—who happened to be a Pisces—literally gasped when she saw them. Suddenly the entire dessert table felt purposeful, like we'd all conspired to celebrate something meaningful about her.
The Art of Constellation Decorating
The first time I tried to place the constellation pearls freehand, I ended up with something that looked more like a abstract splatter than the two connected fish. Now I print out the Pisces constellation pattern and keep it right next to me while I decorate, glancing back and forth like I'm following a treasure map. You can even tape a reference image to the side of your workspace so it's always visible. Taking your time with this step makes the difference between cookies that are pretty and cookies that are actually recognizable as constellation-themed.
Storing Your Starry Creations
These cookies stay fresh in an airtight container for up to five days, though honestly they never last that long in my house. The icing hardens completely after a few hours, so you can stack them carefully or layer them between parchment paper without the decorations shifting around. If you're giving them as a gift, pack them in a sturdy box with padding between layers so the edible pearls don't get jostled loose.
Variations and Personal Touches
Once you master the basic technique, this recipe opens up to so many possibilities. Make them for different zodiac signs by changing the constellation pattern and adjusting the icing color to match—deep purple for Scorpio, gold for Leo, soft pink for Libra. You could use this same cookie and icing base for any celestial theme, swapping in moons, planets, or even a custom monogram instead of a constellation. The beauty of simple sugar cookies is that they're a blank canvas waiting for your creativity.
- Try adding a teaspoon of almond extract to the dough for a subtle flavor shift that feels more sophisticated.
- If you want to make these gluten-free, swap in a quality 1:1 gluten-free flour blend and follow the same process.
- For a special touch, use an edible food marker to draw lines connecting the constellation points after the icing sets.
 Save to Pinterest
 These cookies have become my go-to for celebrating anyone born under Pisces, but really they're about turning something simple into something magical. Every time I make them, I think of that rainy afternoon and how baking turned into something more than just following a recipe.
Common Recipe Questions
- → How do I create the Pisces constellation on the cookies?
Use edible silver pearls or gold dragees placed strategically on the icing to mimic the constellation. Optionally, connect the points with a fine food-safe marker for detail.
- → What type of flour works best for these cookies?
All-purpose flour provides the ideal texture, but a 1:1 gluten-free blend can be substituted for gluten-free versions.
- → How long should the dough be chilled?
Chill the dough for 30 minutes to make it easier to roll and cut, resulting in cleaner shapes and better texture.
- → Can I use different colors for the icing?
Yes, while blue or navy gel food coloring is recommended for a celestial look, feel free to experiment with other colors as desired.
- → How should the decorated cookies be stored?
Store the cookies in an airtight container at room temperature for up to five days to maintain freshness and decoration quality.