 Save to Pinterest
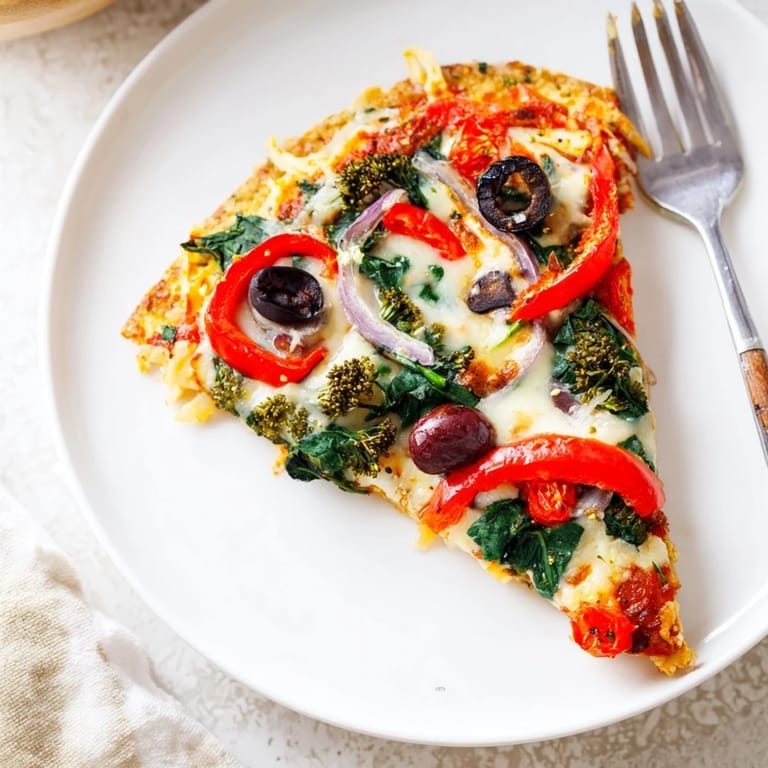
 My daughter came home from college one weekend craving pizza but determined to stick to her new eating plan. We stood in the kitchen staring at a head of broccoli and leftover rotisserie chicken, half-joking about turning them into a crust. An hour later, we were pulling a golden, crispy base from the oven that actually held together. That experiment turned into our most-requested weekend dinner.
I made this for a small gathering once, and no one believed it was broccoli and chicken until I showed them the bowl of scraps. My friend's eight-year-old, who claims to hate vegetables, ate three slices and asked if we could make it at his birthday party. That moment proved to me that good food doesn't need to announce its health credentials to win people over.
Ingredients
- Cooked broccoli florets: Use florets that are tender but not mushy, and squeeze out excess moisture with a clean towel so the crust doesn't turn soggy.
- Cooked chicken breast: Rotisserie chicken works beautifully here and adds a subtle seasoning that enhances the whole crust.
- Large egg: This binds everything together, so don't skip it or the crust will crumble when you slice it.
- Shredded mozzarella cheese: Melts into the crust and creates those stretchy, satisfying bites you expect from pizza.
- Grated Parmesan cheese: Adds a nutty, salty depth that makes the crust taste intentional, not like a compromise.
- Dried oregano: A classic pizza flavor that bridges the gap between vegetable base and pizza experience.
- Garlic powder: Infuses every bite with warmth without overpowering the other ingredients.
- Salt and black pepper: Essential for bringing out the natural flavors and keeping the crust from tasting flat.
- Sugar-free tomato sauce or pizza sauce: Choose one with good flavor since it sits right on top and defines the pizza taste.
- Shredded mozzarella cheese (for topping): Go generous here, it creates that bubbly, golden finish everyone loves.
- Red onion: Thinly sliced so it softens and caramelizes slightly in the oven without overwhelming the other toppings.
- Red bell pepper: Adds sweetness and a pop of color that makes each slice look vibrant and inviting.
- Cherry tomatoes: They burst with juice in the oven and add little pockets of bright, fresh flavor.
- Black olives: Salty, briny bites that contrast beautifully with the milder vegetables.
- Baby spinach leaves: Wilts down during baking and tucks into every corner, adding nutrition without bulk.
- Dried Italian herbs: A final sprinkle that pulls all the flavors together and makes the kitchen smell like a pizzeria.
Tired of Takeout? 🥡
Get 10 meals you can make faster than delivery arrives. Seriously.
One email. No spam. Unsubscribe anytime.
Instructions
- Prep the Oven:
- Preheat your oven to 425°F and line your baking sheet with parchment paper so the crust releases easily after baking. This high heat is key to getting a firm, golden base.
- Mix the Crust:
- Combine the broccoli, chicken, egg, cheeses, and seasonings in a large bowl, mixing until it looks like a cohesive, slightly sticky dough. Your hands work best here for getting everything evenly distributed.
- Shape the Base:
- Transfer the mixture onto your prepared sheet and press it into a 12-inch round, keeping the thickness even so it bakes uniformly. Smooth the edges with damp fingers to prevent cracking.
- Bake the Crust:
- Slide it into the oven for 20 minutes until the edges turn golden and the surface feels firm when you press it lightly. This pre-bake is crucial for structural integrity.
- Add the Sauce:
- Pull the crust out and spread your tomato sauce right to the edges, leaving no dry spots. Let it cool for just a minute so the sauce doesn't immediately slide off.
- Layer the Toppings:
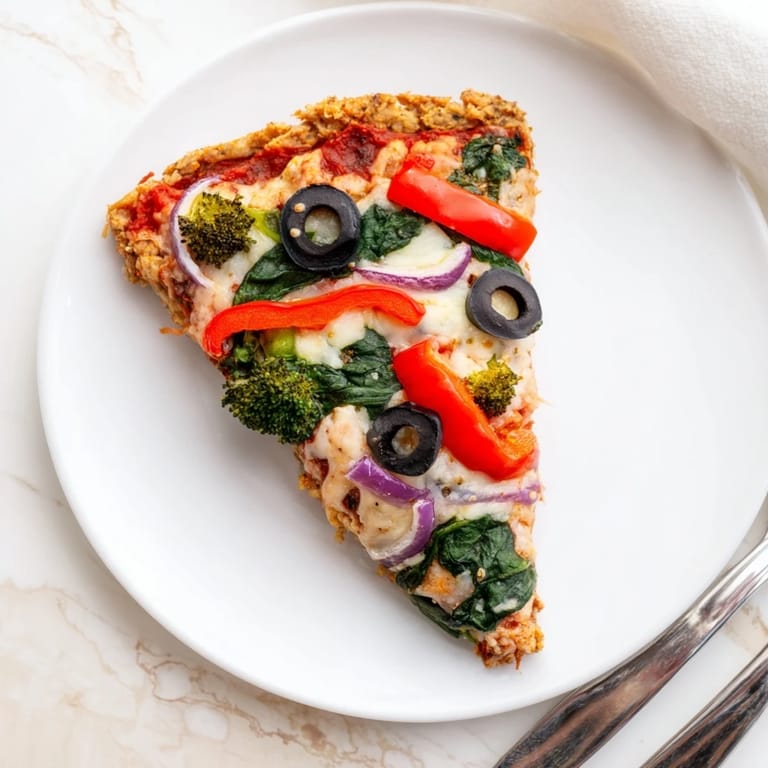
- Scatter the mozzarella first, then arrange your veggies in an even layer so every slice gets a bit of everything. Finish with a sprinkle of Italian herbs.
- Final Bake:
- Return the pizza to the oven for 8 to 10 minutes, watching for the cheese to bubble and develop golden spots. The spinach will wilt down and the colors will deepen beautifully.
- Garnish and Serve:
- Let it rest for a few minutes before slicing so the cheese sets slightly and the slices hold together. Add chili flakes or fresh basil if you want an extra flourish.
 Save to Pinterest
 One evening my husband said he didn't miss regular pizza anymore after his third slice of this. He meant it as a compliment, but it made me realize how much we'd adjusted our idea of comfort food without feeling deprived. This pizza became proof that you can change the rules and still love the game.
Choosing Your Toppings
I've tried this with everything from leftover roasted vegetables to artichoke hearts and sun-dried tomatoes. The crust is forgiving and handles moisture well as long as you don't pile on anything too watery. Mushrooms, zucchini, and even a handful of arugula added after baking all work beautifully. Keep your toppings varied in texture so each bite feels interesting, and remember that less is often more when the base is this flavorful.
Making It Ahead
You can pre-bake the crust in the morning and keep it wrapped in the fridge until dinner. When you're ready, just add the toppings and bake as directed. I've even frozen the par-baked crust for up to a month, then topped and baked it straight from the freezer, adding a few extra minutes to the final bake. It's a lifesaver on nights when cooking from scratch feels impossible.
Storing and Reheating
Leftover slices keep well in an airtight container in the fridge for up to two days. Reheat them in a hot oven or toaster oven rather than the microwave so the crust regains its crispness and the cheese gets bubbly again. Cold slices are surprisingly good too, especially for a quick lunch when you want something satisfying without turning on the stove.
- Store slices separated by parchment to prevent sticking.
- Reheat at 375°F for about 8 minutes for best texture.
- Freeze individual slices wrapped tightly for up to one month.
 Save to Pinterest
 This pizza turned into one of those recipes I make without measuring anymore, adjusting by feel and mood. It reminds me that the best meals are the ones that adapt to your life, not the other way around.
Common Recipe Questions
- → Can I prepare the crust ahead of time?
Yes, you can prepare the crust mixture up to 24 hours in advance. Store it in an airtight container in the refrigerator, then shape and bake when ready. You can also bake the crust completely and refrigerate it, then add toppings and warm through before serving.
- → What vegetables work best as alternatives?
Try mushrooms, artichoke hearts, grilled zucchini, roasted garlic, sun-dried tomatoes, or caramelized onions. Avoid watery vegetables like raw tomatoes if you prefer a crispier crust; pre-cook them slightly first.
- → How do I make this dairy-free?
Replace mozzarella and Parmesan with dairy-free cheese alternatives that melt well. Use vegan-friendly binders in the crust if needed. Check that your tomato sauce contains no dairy products for a fully plant-based version.
- → Why is my crust not holding together?
Ensure your broccoli and chicken are finely chopped and well-drained to remove excess moisture. The egg acts as a binder, so it's essential not to skip it. If the mixture seems too wet, add a tablespoon of almond flour or coconut flour to firm it up.
- → Can I freeze leftovers?
Yes, store cooled slices in an airtight freezer container for up to 3 weeks. Reheat in a 350°F oven for 10-12 minutes to restore the crust's texture. Thaw in the refrigerator for easier reheating if preferred.
- → Is this suitable for meal prep?
Absolutely. Prepare individual portions by slicing the pizza before storing. This makes reheating portions faster and more convenient. The crust maintains its structure well throughout the week when stored properly in airtight containers.