Save to Pinterest
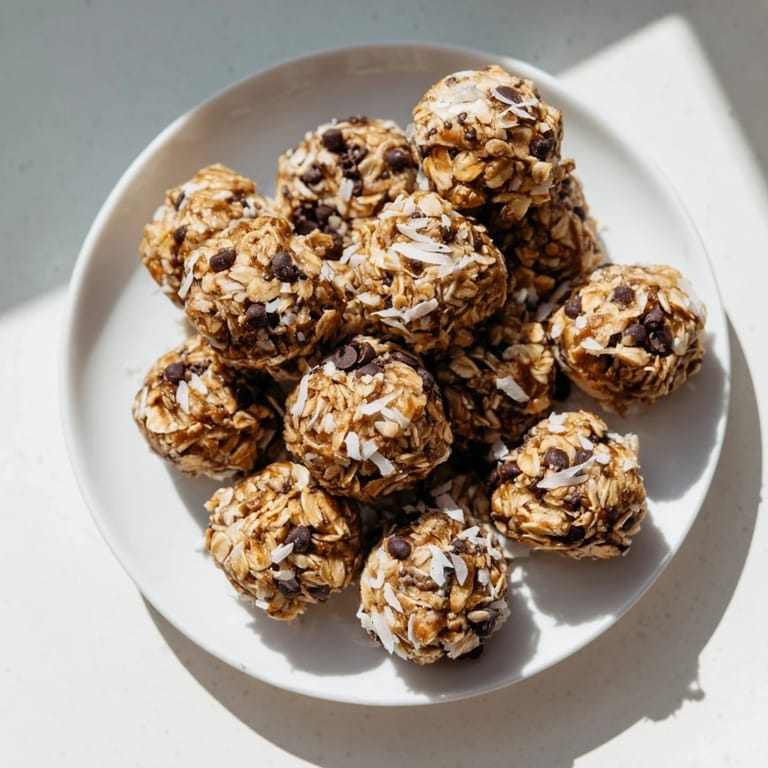
 I discovered these while standing in my kitchen on a Tuesday afternoon, staring at a half-empty jar of almond butter and wondering why I kept buying protein bars I didn't actually enjoy. Something clicked—what if I just made them myself? Twenty minutes later, I had sixteen little energy bites cooling on my counter, and I haven't looked back since.
My sister came by unannounced one afternoon and found me rolling these little balls in my kitchen. She ate three before sitting down, then asked for the recipe while still chewing. Now she makes them every Sunday and swears they're why she can actually stick to her gym routine.
Ingredients
- Rolled oats: They're the quiet backbone here—choose gluten-free if that matters to you, and don't skip this; they give the bites their structure and staying power.
- Chia seeds: These tiny powerhouses add texture and nutrients; I learned the hard way they're worth the splurge.
- Almond butter: The creamy heart of everything—make sure it's the natural kind without added oils, or the mixture becomes too loose.
- Honey or maple syrup: This is your binder and sweetener; use whichever you have, though maple syrup keeps them vegan if that's your thing.
- Vanilla extract: Just a touch, but it bridges all the flavors together beautifully.
- Shredded coconut: Optional, but it adds a subtle nuttiness that makes people ask what's in them.
- Dark chocolate chips: I use mini ones because they distribute evenly, and dark chocolate feels less guilty than milk chocolate.
- Sea salt: A pinch that somehow makes everything taste more intentional.
Tired of Takeout? 🥡
Get 10 meals you can make faster than delivery arrives. Seriously.
One email. No spam. Unsubscribe anytime.
Instructions
- Mix the dry foundation:
- Combine your oats, chia seeds, and coconut in a large bowl. This is where you set the texture foundation—I like to stir it a few times to feel how loose or compact it is before adding the wet ingredients.
- Create the sticky base:
- Add almond butter, honey, and vanilla all at once, then stir with intention until everything is evenly coated and the mixture feels uniformly sticky. You'll know it's right when you can squeeze a handful and it holds together.
- Fold in the finishing touches:
- Scatter in chocolate chips and a pinch of salt, folding gently so they're distributed without overdoing it and crushing everything.
- Shape with damp hands:
- Wet your hands slightly under the tap—this prevents sticking better than any trick I've found—then roll the mixture into 1-inch balls. Work quickly or the mixture softens and becomes harder to handle.
- Chill and set:
- Arrange them on parchment paper and slide the tray into the fridge for at least 30 minutes. This step is non-negotiable; it's what transforms them from soft dough into proper bites with structure.
 Save to Pinterest
 What strikes me most is how these little bites somehow turned snacking into something I actually feel good about. They sit in a glass container on my kitchen shelf, and instead of reaching for something processed when I'm hungry, I grab one of these—and I feel the difference.
Storage and Keeping Them Fresh
Store these in an airtight container on the coldest shelf of your fridge, where they'll stay perfect for up to a week. I've kept them longer and they're fine, just slightly softer—which honestly isn't bad if you prefer a chewier bite. You can also freeze them for up to a month if you're thinking ahead, though I rarely get that far because they disappear too quickly.
Variations That Work Beautifully
These are endlessly flexible, which is part of why I keep making them. Swap almond butter for peanut or cashew butter—I've done this a dozen times depending on what's in my pantry. Add a tablespoon of flaxseed meal if you want to feel extra virtuous, or mix in some cocoa powder to make them taste like brownie bites.
Why This Recipe Became My Go-To
There's something honest about these bites that appeals to me. They're not pretending to be something they're not, yet they deliver exactly what you need in those moments between meals. No complicated equipment, no mysterious ingredients, just real food your body actually recognizes.
- They're genuinely faster than the time it takes to scroll through snack options at the store.
- Your kitchen will smell amazing while you're making them—that nutty, toasty almond butter smell lingers in the best way.
- Everyone who tries them asks for the recipe, which never gets old.
 Save to Pinterest
 These energy bites have become my answer to that question everyone asks themselves: how do I eat better without making it complicated? This recipe is proof that the simplest solutions often taste the best.
Common Recipe Questions
- → Can I use other nut butters instead of almond butter?
Yes, peanut butter or cashew butter can be substituted for almond butter with similar texture and flavor.
- → How do I make these energy bites vegan?
Swap honey for maple syrup to keep these bites plant-based and suitable for a vegan diet.
- → What is the best way to store these bites?
Keep them in an airtight container refrigerated for up to one week to maintain freshness and texture.
- → Can I add other seeds or nuts to these bites?
Yes, flaxseed meal or chopped nuts can be added for extra nutrition and crunch.
- → Are these bites gluten-free?
They are gluten-free if certified gluten-free oats are used; otherwise, oats may contain traces of gluten.