 Save to Pinterest
 The first time I shaped a turkey from sourdough, my hands felt clumsy, uncertain whether I was making bread or sculpting. But as the dough began to take form—a plump body here, a graceful head there, little teardrop feathers fanning out—something clicked. What started as an ambitious holiday experiment became a tradition my family now expects, and honestly, watching guests do a double-take when a bread loaf waddles onto the table never gets old.
One November, I made this bread for a friendsgiving potluck where someone had already committed to bringing store-bought rolls. When I arrived with my golden, olive-eyed turkey loaf, the room went quiet for just a second—then everyone laughed, reached for their cameras, and honestly? That moment of joy made the 12-hour process completely worth it.
Ingredients
- 500 g bread flour: This is your foundation; it has enough protein to develop the structure that gives sourdough its characteristic open crumb and chew.
- 350 g room-temperature water: Cold water slows fermentation, so I always use water that's been sitting out, which helps the starter work more predictably.
- 100 g active sourdough starter at 100% hydration: This is the heart of the bread—fed and bubbly before you use it, it brings the tang and lift that makes sourdough sing.
- 10 g fine sea salt: Added after the autolyse, salt strengthens the gluten network and deepens flavor without harshening the tang.
- Black olives or peppercorns: These become the eyes that give your turkey personality; I press them in gently during assembly so they don't disappear into the crumb.
- 1 small piece red bell pepper or dough: The little wattle adds a realistic detail and a pop of color—or use a small rope of dough painted red if you prefer everything homemade.
- 1 egg for egg wash (optional): This creates that beautiful glossy, dark golden crust; skip it for vegan, and brush with plant milk instead for a gentler sheen.
- Seeds for feather accents: Poppy, sesame, or flax seeds scattered before baking echo real feathers and add a subtle nutty flavor.
Tired of Takeout? 🥡
Get 10 meals you can make faster than delivery arrives. Seriously.
One email. No spam. Unsubscribe anytime.
Instructions
- Mix flour and water, then rest:
- Combine them in your bowl and let the dough sit covered for 30-45 minutes—this autolyse period lets the flour fully hydrate and makes everything easier to mix once the starter arrives. You'll notice the dough transforms from shaggy to more cohesive just from this rest.
- Add starter and salt, then mix thoroughly:
- Stir until every bit of flour is incorporated and you can't see any dry streaks. The dough will feel loose and slightly sticky, which is exactly what you want.
- Stretch and fold to build strength:
- Over the next 2 hours, perform 3-4 sets of stretches and folds, working every 30 minutes. Grab one side of the dough, stretch it up and fold it over the middle, rotate the bowl, and repeat four times per set—you're building the gluten network without aggressive kneading.
- Bulk ferment until doubled:
- Cover and leave at room temperature (ideally 21-23°C/70-74°F) for 5-7 hours. The dough should become noticeably puffier, bubbly on the surface, and jiggly when you gently shake the bowl; if your kitchen runs cool, give it the full 7 hours.
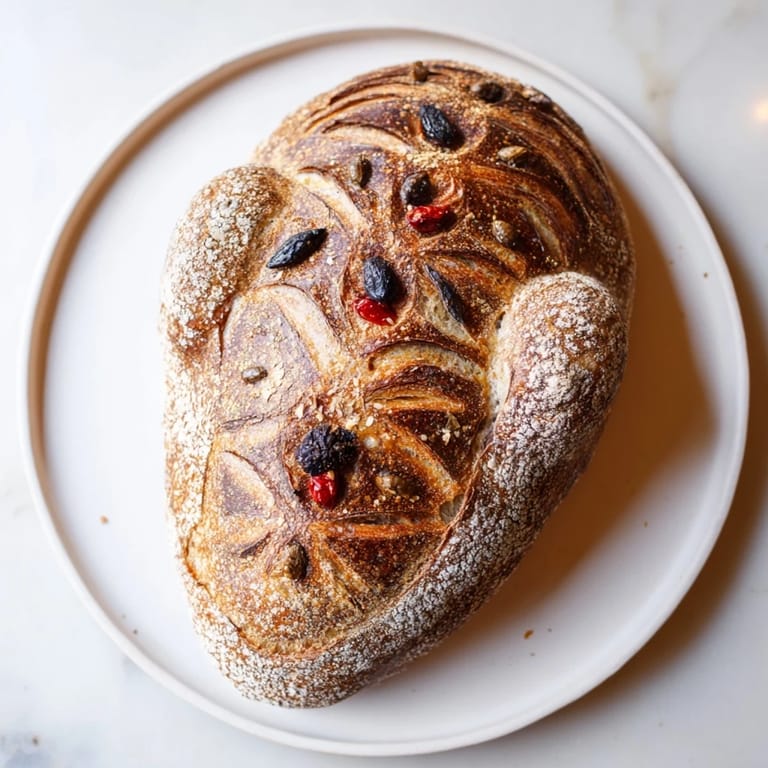
- Shape the turkey body and parts:
- Flour your work surface lightly and gently turn the dough out. Shape one large oval for the body, pinch off a smaller round for the head, and create several teardrop shapes for tail feathers and wings—don't stress about perfection, as the dough will relax and adjust. Handle it gently so you don't deflate all your hard-won air.
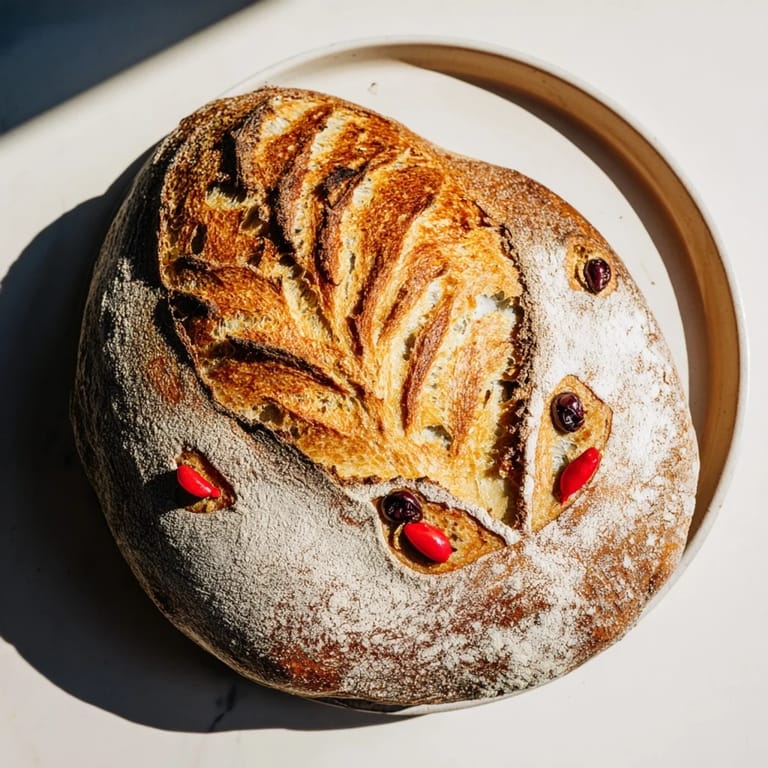
- Assemble on parchment and score:
- Arrange the body oval on parchment, then use a little water as glue to attach the head slightly overlapping. Fan the teardrop feathers and wings around the body, then use a sharp knife or lame to score feather details into the dough, creating texture that echoes real plumage.
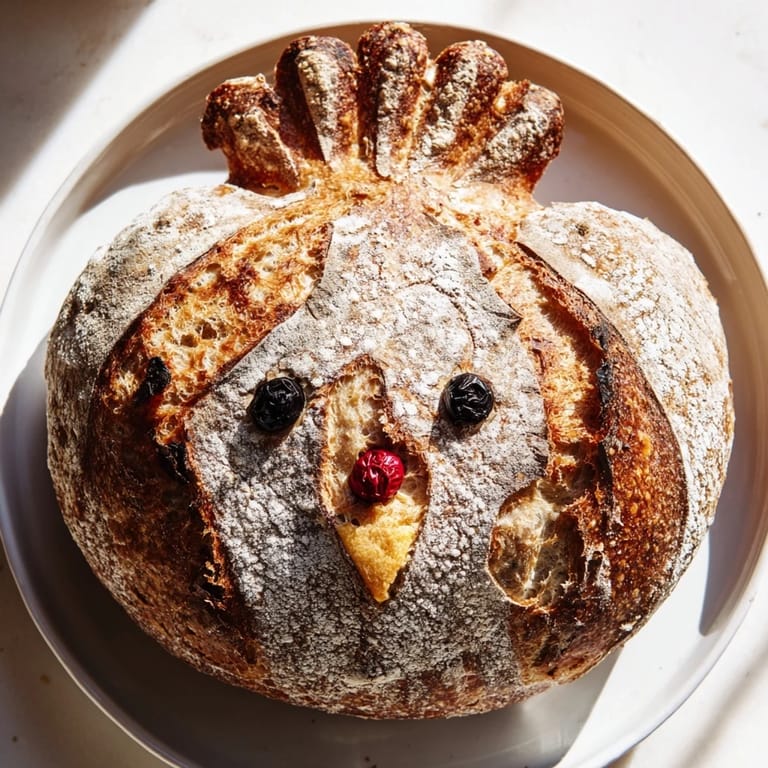
- Add facial features:
- Press olive slices or peppercorns into the head for eyes, and attach a small piece of red bell pepper or a painted dough rope as the wattle just below—these details are what make people smile.
- Final proof:
- Cover loosely and let the shaped loaf rest at room temperature for 1-2 hours until it's slightly puffy and shows new volume. This shorter proof prevents overproofing while allowing the shaped dough to set.
- Heat your oven with the baking stone:
- Preheat to 230°C (450°F) with a baking stone or steel inside for at least 30 minutes—a well-preheated stone is what gives you that dramatic oven spring and thick, shatteringly crisp crust.
- Egg wash and seeds (optional):
- If using, brush the assembled loaf gently with beaten egg, then scatter seeds strategically on the feathers for a finished look. For vegan, brush with plant milk or skip entirely.
- Score and bake with steam:
- Carefully slide the parchment-lined loaf onto the preheated stone. Throw a handful of ice cubes into the oven or spray the walls with water to create steam, then bake for 20 minutes—the steam helps the crust expand beautifully and deepens the color.
- Finish baking at lower heat:
- Reduce heat to 200°C (400°F) and bake for another 20 minutes until the crust is deep golden brown and the loaf sounds hollow when you tap the bottom. The internal temperature should reach about 205°C (400°F) if you have a thermometer.
- Cool completely before serving:
- Transfer to a wire rack and resist the urge to cut into it for at least an hour—the crumb is still setting inside, and slicing too early makes it gummy. The wait is hard but worth every minute.
 Save to Pinterest
 I'll never forget my daughter asking if the turkey was going to gobble, then being genuinely amazed it was bread. That moment when art and food collided, when something she'd watched me shape over hours became something real enough to eat—that's when I understood this recipe is about more than feeding people.
Timing Your Fermentation for Perfect Results
Sourdough doesn't follow a clock; it follows temperature and the mood of your kitchen. A warm afternoon might reduce bulk fermentation to 5 hours, while a chilly morning might stretch it to 7. I learned to ignore my phone timer and instead watch the dough itself—when it's roughly doubled, jiggly, with visible bubbles breaking the surface, you're ready to shape, regardless of what the clock says. This flexibility is actually freeing once you stop fighting it.
Shaping Without Stress
The first time I shaped this bread, I fretted that my teardrop feathers weren't symmetrical or perfectly sized. Then I realized the imperfections are exactly what make it charming—real turkeys aren't geometrically perfect, and neither should our bread be. The dough parts stick together naturally where they touch, water acts as a gentle glue if needed, and any gaps just give the bread character. Expect your turkey to look a bit wonky, and embrace it.
Why This Bread Works for Any Celebration
Beyond holidays, this loaf has shown up at friends' birthday dinners, book clubs, even as a housewarming gift with a handwritten note about the fermentation timeline. It's forgiving enough for beginners but impressive enough for confident bakers, and it photographs beautifully without any styling tricks. The flavor speaks for itself—tangy, complex sourdough with that perfect chew—which means it works equally well torn into a soup, alongside salad, or served as the centerpiece itself.
- Make extra dough to bake a simple round or oval loaf at the same time so you're not putting all your effort into one bird.
- If you're nervous about shaping, try sketching your turkey on parchment first—it sounds silly but it helped me visualize the proportions.
- Keep a spray bottle of water near your work surface for easy assembly and to prevent the dough from drying out while you're positioning pieces.
 Save to Pinterest
 This bread is a reminder that feeding people can be playful, creative, and deeply satisfying all at once. Make it once and it becomes yours to share, year after year.
Common Recipe Questions
- → What flour works best for the sourdough?
High-protein bread flour provides strong gluten structure needed for good rise and chewy texture.
- → How long is the fermentation process?
Bulk fermentation takes 5–7 hours at room temperature, followed by a 1–2 hour proof after shaping.
- → Can I make this loaf vegan?
Yes, simply omit the egg wash and use plant milk for brushing if desired.
- → How do I achieve the steam effect during baking?
Slide the loaf onto a preheated baking stone with steam, created by adding water to a pan or using a covered oven method.
- → What decorations can be used for turkey features?
Black olives or peppercorns for eyes, and small pieces of red bell pepper or dough for the wattle add visual detail.