 Save to Pinterest
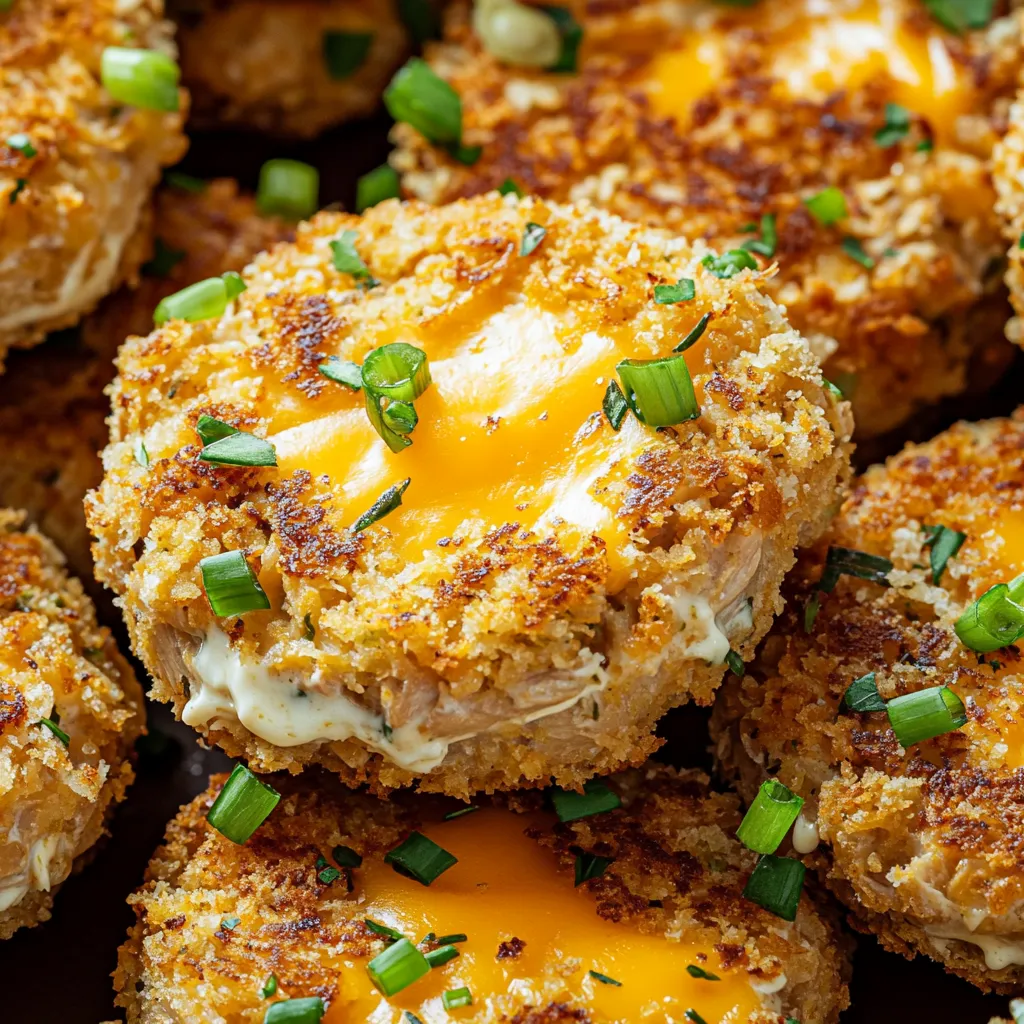
 Crispy on the outside and irresistibly melty inside these Tuna Melt Patties are a lightning fast answer to busy weeknights or lazy weekends when you crave classic comfort without heating up the oven. With just tuna from the pantry a handful of breadcrumbs and a generous handful of cheese you get the warm satisfaction of a diner tuna melt packed into a golden brown patty you can serve in sandwiches or beside a simple salad.
I made these the first time on a rushed lunch break and was amazed that every bite took me back to childhood diner lunches. Now whenever I spot tuna cans in the pantry my family expects patties for dinner.
Ingredients
- Canned tuna: two five ounce cans for savory richness and plenty of protein pick firm tuna packed in water for best texture
- Breadcrumbs: half cup helps patties hold together and adds crunch I prefer panko for lighter texture
- Mayonnaise: quarter cup for moisture and classic tang choose a whole egg mayo for richness
- Egg: binds the patties so they never fall apart use a large egg for best hold
- Dijon mustard: one teaspoon adds subtle depth smooth Dijon gives the brightest flavor
- Garlic powder: half teaspoon for gentle savoriness try fresh crushed garlic for even more punch
- Onion powder: half teaspoon for well rounded flavor without chopping onions
- Salt: half teaspoon for seasoning go for kosher or sea salt for clean taste
- Black pepper: quarter teaspoon for gentle heat use freshly ground for maximum aroma
- Cheddar cheese: half cup shredded melts best and offers sharp flavor block cheddar grates well and melts smoothly
- Green onions: two tablespoons brings fresh top notes always choose firm bright green stalks
- Butter: for frying adds flavor and helps get the patties perfectly golden I use unsalted to control the salt in the dish
Step-by-Step Instructions

- Combine the Tuna Mixture:
- In a large mixing bowl break apart the drained tuna with a fork until flaked and even Add breadcrumbs mayonnaise egg Dijon mustard garlic powder onion powder salt and black pepper Mix thoroughly with a fork or clean hands until the ingredients are fully combined and no dry spots remain
- Add Cheese and Form Patties:
- Sprinkle in the shredded cheddar cheese and chopped green onions Fold gently to distribute the cheese and onions evenly throughout the mixture With clean damp hands shape into four or five even patties compressing just enough that they hold their shape without being overly packed
- Cook the Patties:
- Preheat a large skillet over medium heat and melt the butter until just foaming Place the patties into the pan without overcrowding Cook the first side for three to four minutes until it turns deeply golden and forms a crunchy crust Flip carefully with a spatula and cook the other side for another three to four minutes until the second side is also crisp and the center is warmed through
- Serve and Enjoy:
- Transfer finished patties to a plate Serve on toasted bread or English muffins for a classic sandwich or place beside a crisp green salad Optionally top each patty with a thin slice of cheese and broil for one minute until melted and bubbling

 Save to Pinterest
 I love the mellow sharpness that cheddar brings to these patties it always reminds me of sharing grilled cheese nights with my sister when we would try every crazy cheese combo we could find.
Storage Tips
Store leftover patties in an airtight container in the refrigerator for up to three days. Reheat gently in a skillet over low heat or microwave them on low just until warmed through to help maintain moisture and crispness. These patties also freeze surprisingly well just wrap tightly and freeze for up to one month then thaw in the fridge before reheating.
Ingredient Substitutions
If you need to go gluten free swap the breadcrumbs for your favorite GF variety or even finely crushed cornflakes. For a dairy free version use vegan mayo and skip the cheese or pick a plant based alternative. The patties work well with canned salmon too for a different spin on the classic.
Serving Suggestions
These patties shine on toasted sourdough with a smear of Dijon or inside a soft English muffin with lettuce and tomato. For a light lunch I serve them over mixed greens with a simple vinaigrette or for a heartier meal pile them beside roasted potatoes and steamed veggies.
 Save to Pinterest
Cultural and Historical Context
The classic tuna melt sandwich was a diner staple in the mid 20th century packed with the postwar popularity of canned fish. The patties are a fun modern twist on that tradition turning everything you love about a melt into a crispy bite sized form easy to share and adapt.
Common Recipe Questions
- → How can I prevent the patties from falling apart?
Ensure the mixture binds by using enough egg and breadcrumbs. Adjust crumbs or mayonnaise to achieve a firm texture before forming patties.
- → Which cheese works best for these patties?
Cheddar provides sharp flavor, but Swiss, mozzarella, or Pepper Jack can be used for different tastes and melt qualities.
- → Can I use fresh tuna instead of canned?
Yes, cooked and flaked fresh tuna can be substituted, though canned tuna is recommended for convenience and moisture.
- → What is the recommended way to serve these patties?
They’re delicious on toasted bread, English muffins, or served with a fresh salad for a lighter meal option.
- → How do I make the patties extra crispy?
Panko breadcrumbs create a crunchier crust. Ensure patties are cooked undisturbed until golden before flipping.
- → Can patties be made in advance?
Shape and chill patties ahead of time for quicker meals. Reheat gently in the oven or skillet for best results.