 Save to Pinterest
 This crispy take on grilled cheese turns everyday sandwich bread and cheese into bite sized roll ups with a golden crust and gooey center. Grilled Cheese Roll Ups are perfect for lunchboxes or a quick at home snack when hunger hits fast.
There is always a mad dash for these as soon as they hit the table in my house. The first time I made them we quickly realized we needed to double the batch because they disappeared so fast.
Ingredients
- Soft white sandwich bread: eight slices removes the crusts so you get the perfect seamless roll
- Cheddar cheese slices: one for each roll keep it classic or use mozzarella or American for your favorite melt
- Unsalted butter: three tablespoons softened for easy spreading and buttery crisp edges
- Choose bread that is soft but not too airy and cheese that melts easily. Look for fresh butter without any fridge flavor for the best results.
Tired of Takeout? 🥡
Get 10 meals you can make faster than delivery arrives. Seriously.
One email. No spam. Unsubscribe anytime.
Instructions
- Prepare the Bread:
- Start by laying out all bread slices on a flat surface. Use a rolling pin to gently flatten each piece until it is very thin and even. This makes the bread easier to roll and gives your roll ups a uniform crispiness.
- Fill and Roll:
- Layer one cheese slice on each flattened bread piece. If the cheese overhangs the edges trim it to fit neatly. Roll up the bread tightly around the cheese and press along the seam to help it seal.
- Butter the Skillet:
- Add the unsalted butter to a large nonstick skillet. Set over medium heat and allow it to melt fully swirling the pan to coat the surface evenly.
- Arrange and Cook Roll Ups:
- Place the prepared roll ups seam side down in the skillet. Cook them for one to two minutes on the first side until they turn golden. Continue turning every one to two minutes so every side crisps up beautifully. This should take about six to eight minutes in total.
- Serve Hot:
- As soon as all sides are crispy and golden remove the roll ups and serve while warm. Offer ketchup tomato soup or your dip of choice for dunking.
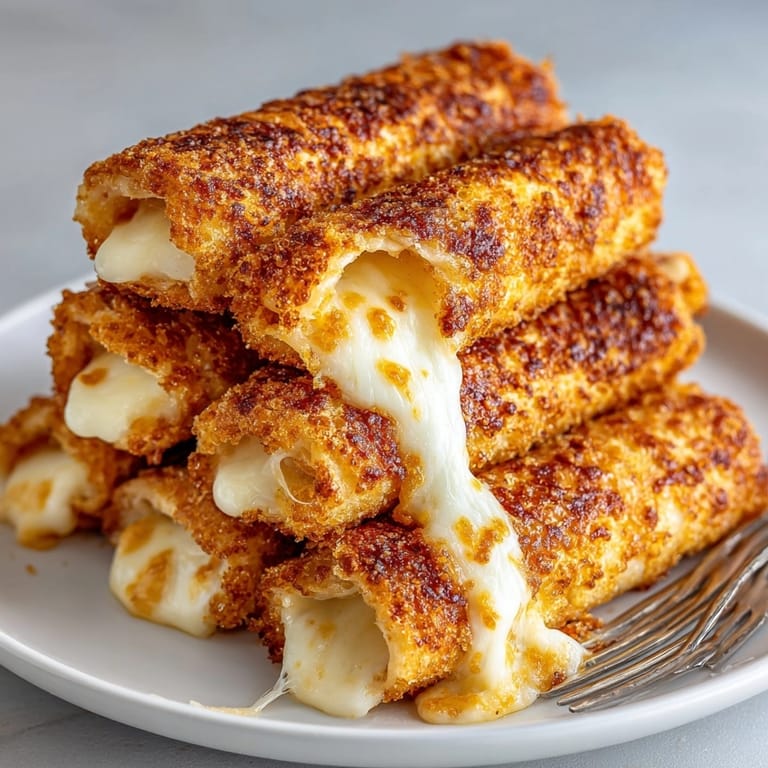
 Save to Pinterest
 I am a huge fan of how the thinnest layer of butter browns the bread just right. My son loves helping trim the crusts and always tries to sneak an extra cheese slice.
Storage Tips
Let leftovers cool before storing in an airtight container. They will keep in the fridge for up to two days. When ready to reheat put them in a toaster oven or skillet to bring back that crispy texture. Skip the microwave as it makes them chewy instead of crisp.
Ingredient Substitutions
Swap white bread for whole wheat or gluten free bread for a healthy or allergy friendly version. Stretch your creativity with cheese using pepper jack for some kick or Gouda for a grown up twist. A dab of garlic butter in place of plain butter brings a flavorful upgrade.
Serving Suggestions
Slice roll ups into thirds for party platters or serve whole as a main with salad. They pair well with a bowl of tomato soup for dipping or a tangy mustard sauce for adults. Drizzle with honey for a sweet take that you have to try at least once.
Cultural and Historical Context
Grilled cheese first appeared in America in the nineteen twenties as a simple comfort food and has never gone out of style. These roll ups are a viral TikTok spin that brings back nostalgia for classic lunches but with an easy to eat twist. Now they have become a popular after school snack across kitchens everywhere.
Seasonal Adaptations
Add a few fresh basil leaves and a slice of ripe tomato for a summer version Try adding a sprinkle of dried rosemary or sage in fall Make a wintery version with a bit of crumbled cooked bacon tucked inside
Success Stories
These little roll ups have traveled from my kitchen to classroom parties and even picnics at the park. Kids and adults grab them faster than almost anything else I bring. My friend once packed a dozen for her college finals week snacks and said they beat any vending machine option by far.
Freezer Meal Conversion
You can freeze unbaked roll ups tightly wrapped. When ready to eat thaw overnight then cook as usual until golden and crisp. This makes meal prep or party planning completely stress free.
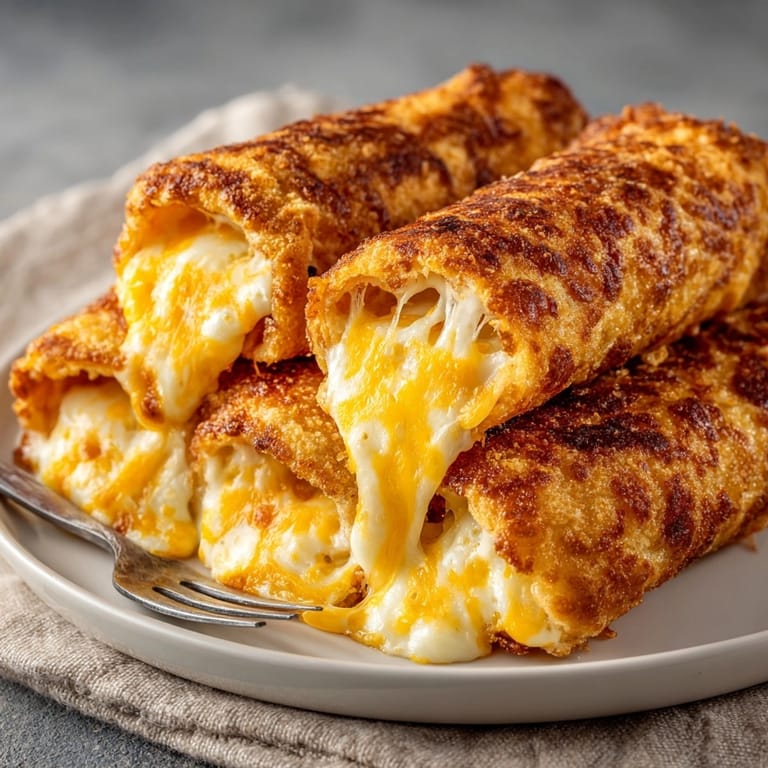
 Save to Pinterest
 I learned the hard way not to overload with cheese or it will ooze out and burn in the pan. Less is more for perfectly neat roll ups.
Common Recipe Questions
- → How do I keep the roll-ups sealed during cooking?
Press the bread firmly when rolling and place seam-side down in the skillet until the bottom crisps.
- → Can I use other types of cheese for these roll-ups?
Yes, mozzarella, American, or any melt-friendly cheese works well in this dish.
- → What dipping sauces pair best with these roll-ups?
Tomato soup, ketchup, ranch, or a spicy mayo all make delicious accompaniments.
- → How do I make a lighter version of these roll-ups?
Opt for whole wheat bread and reduced-fat cheese to cut back on calories while maintaining flavor.
- → Can leftovers be stored and reheated?
Yes, refrigerate leftovers and reheat in a toaster oven for restored crispiness. Best enjoyed fresh.
- → Are these roll-ups suitable for vegetarians?
With cheese and bread as main ingredients, this dish fits well within a vegetarian diet.