 Save to Pinterest
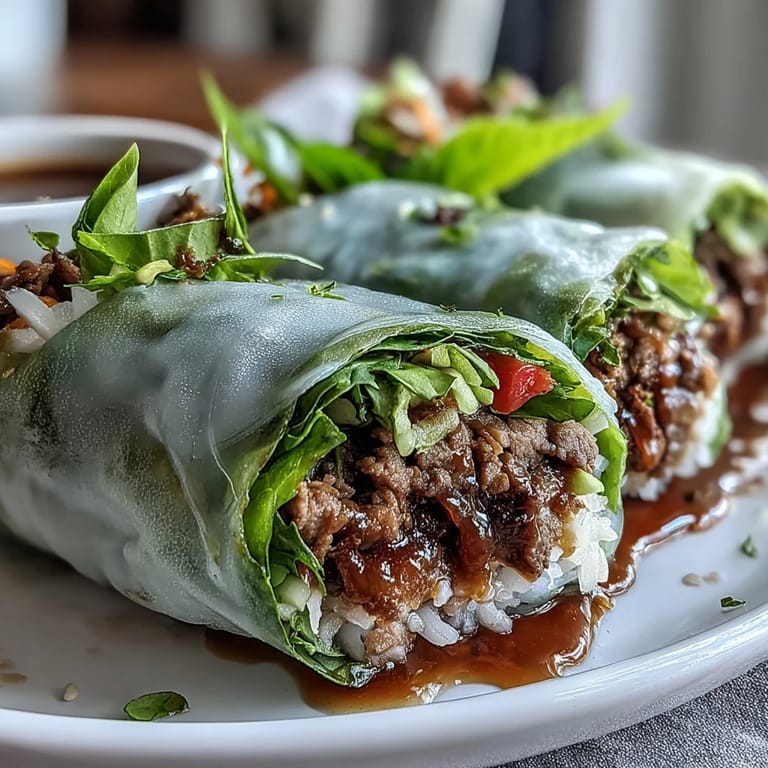
 There's a particular moment I chase every time I make these rolls—that first bite where the rice paper gives way and all those flavors hit at once. I discovered Thai basil beef rolls completely by accident, actually, when I was trying to use up leftover ground beef and some herbs my neighbor had grown. What started as improvisation became something I find myself craving on lazy afternoons, especially when I want something that feels both light and deeply satisfying.
I made a batch of these for my friend Marcus on a humid summer evening when we were both too tired to go out. Watching him take that first bite, then immediately ask for the recipe—that's when I knew I'd stumbled onto something special. Now whenever he visits, these rolls are the unspoken agreement of what we're making.
Ingredients
- Ground beef (1 lb, 85-90% lean): The lean percentage keeps things from becoming greasy; I learned this the hard way with a fattier batch that left an oily mouth-feel.
- Neutral oil (1 tbsp): Any mild oil works here—I use canola because it doesn't compete with the aromatics.
- Garlic and shallot (3 cloves, 1 shallot): These form the flavor foundation; mince them fine so they dissolve into the beef rather than appearing as chunks.
- Thai bird's eye chilies or red chili flakes (2 chilies or 1-2 tsp): The heat here should announce itself but not overwhelm—adjust to your tolerance.
- Red bell pepper (1 small, diced): It adds sweetness and color without softening too much during the brief cooking time.
- Green onions (3, sliced): Split the white and green parts because they cook at different rates; the whites go in early, greens at the end.
- Fresh Thai basil (1 cup for filling, 1 cup more for rolling): Non-negotiable and irreplaceable—this is what separates a good beef roll from a transcendent one.
- Fish sauce and soy sauce (1 tbsp and 1.5 tbsp): These create the umami backbone; don't skip either one.
- Rice paper wrappers (12-16 large): Buy them slightly thicker than paper-thin—they handle better when wet and won't tear as easily.
- Fresh vegetables for rolling (cucumber, carrot, lettuce): Keep these chilled and dry; water is the enemy of good texture in a finished roll.
- Cilantro and mint (optional but recommended): They brighten everything and give the roll complexity beyond just the beef.
Tired of Takeout? 🥡
Get 10 meals you can make faster than delivery arrives. Seriously.
One email. No spam. Unsubscribe anytime.
Instructions
- Make your sauce base first:
- Whisk together the soy sauce, fish sauce, oyster sauce, sugar, and a splash of water in a small bowl until the sugar dissolves and everything smells like a Thai restaurant kitchen. This is the seasoning for your beef, so taste as you go and adjust before the beef ever hits the pan.
- Start your aromatics:
- Heat oil in a large skillet over medium-high until it shimmers slightly, then add your minced garlic and shallot. You'll know they're ready when the kitchen fills with that toasted, golden smell—about 30 to 45 seconds. Don't let them brown too dark or they'll turn bitter.
- Layer in the heat and greenery:
- Add the minced chilies and the white parts of your green onions, stirring constantly for just 20 to 30 seconds. The goal is to wake up those flavors without cooking them away. Your nose will be the best timer here.
- Cook the beef until it just browns:
- Crumble the ground beef into the pan with a spatula, breaking it into small, even pieces as it cooks. After about 4 to 6 minutes of frequent stirring, it should be mostly cooked with a few browned spots—this is the moment you want, not gray and lifeless.
- Add color with the pepper:
- Toss in your diced red bell pepper and let it soften for 2 to 3 minutes, stirring occasionally. It should stay slightly crisp, not mushy, so watch the timing carefully.
- Bring it all together with sauce:
- Pour your prepared sauce over the beef mixture and toss everything to coat evenly. Cook for another 2 to 3 minutes, letting the sauce reduce and cling to the meat rather than pool at the bottom of the pan. Taste here and adjust seasoning—it should feel bold because it's about to be wrapped in neutral rice paper.
- Add the basil at the very end:
- Turn the heat down to low, then add your chopped Thai basil and the green parts of the green onions. Toss for just 30 to 45 seconds until the basil wilts slightly but still holds its color and fresh herbal punch.
- Finish with a squeeze of brightness:
- Remove from heat and stir in the fresh lime juice, which will cut through the richness and make everything taste more alive. Let the whole mixture cool to room temperature—this step matters because warm filling becomes soggy filling once wrapped.
- Prep your assembly line while beef cools:
- If using rice or noodles, cook and cool them completely. Julienne your vegetables into thin, manageable strips, keep everything in separate bowls, and arrange them within arm's reach of your rolling station. Organization here saves frustration later.
- Mix your dipping sauce:
- Combine fish sauce, lime juice, sugar, and warm water in a bowl, stirring until the sugar dissolves completely. Add minced garlic, sliced chilies, and optional shredded carrot and herbs. Taste for balance—you want salty, sour, sweet, and spicy all playing together. Chill it if you have time.
- Set up your rolling station:
- Fill a shallow dish with warm (not hot) water—hot water makes rice paper tear. Lightly oil a clean board or plate where you'll place the softened wrappers; this prevents sticking without making rolls greasy.
- Soften each wrapper just right:
- Dip a rice paper wrapper into the warm water for only 3 to 5 seconds, rotating it so all edges get moist. It should feel like damp fabric, not soggy—it will continue softening as it sits on your board. If you overdo it, the wrapper tears; if you under-do it, it cracks when you roll.
- Build your rolls with intention:
- On the bottom third of the wrapper, layer about 2 to 3 tablespoons of cooled rice or noodles, then 2 to 3 tablespoons of your beef mixture slightly off-center. Top with thin strips of cucumber and carrot, a small handful of lettuce, and scattered cilantro, basil, and mint. Don't overfill or the roll will split when you fold.
- Execute the fold and roll:
- Fold the bottom edge of the wrapper up and over the filling, then fold in both sides like you're wrapping a burrito, then roll tightly away from you into a neat cylinder. The motion should be firm but not aggressive—let the wrapper do the work.
- Set aside and repeat:
- Place each finished roll seam-side down on a plate and continue until all your filling is used. If you're making multiple batches, cover finished rolls with a damp towel and plastic wrap to keep them from drying out.
- Serve with intention:
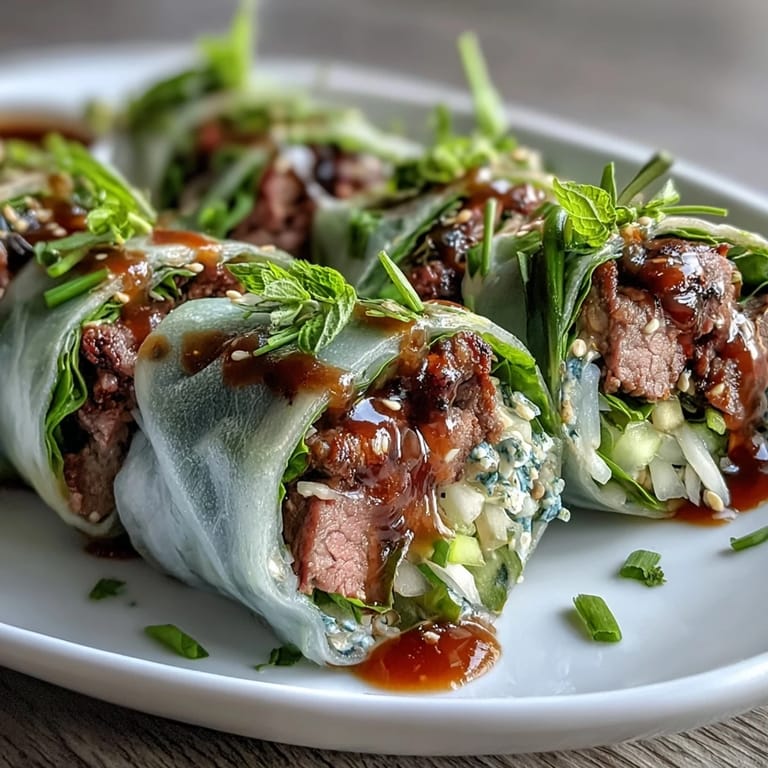
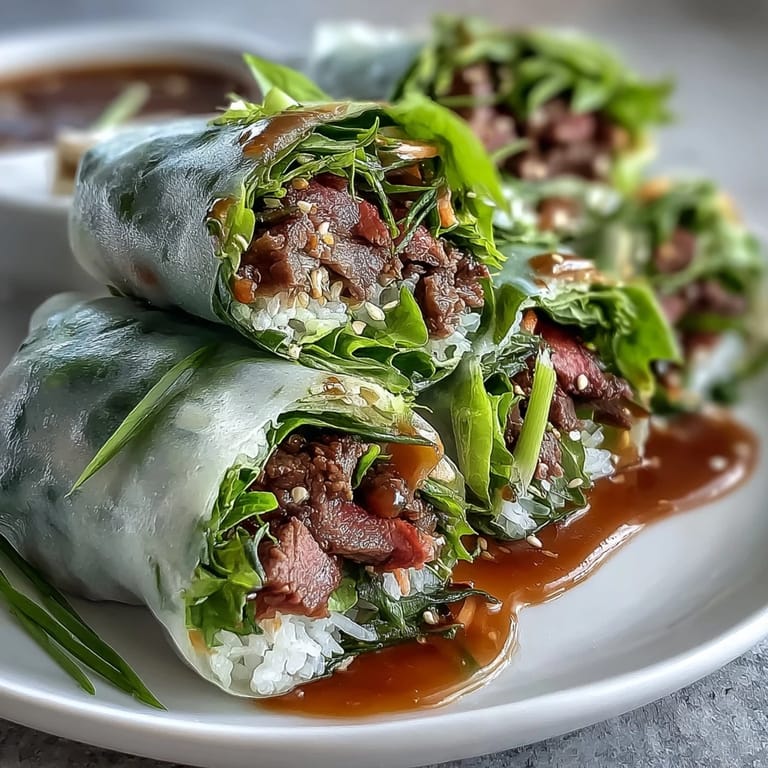
- Serve whole or slice diagonally to show off the pretty cross-section. They're best eaten immediately while the wrapper still has that delicate texture, dipped into the bright, spicy sauce. If you need to store them, cover and refrigerate for up to 2 to 3 hours, then let them sit at room temperature for 10 to 15 minutes before serving—cold rolls feel stiff and unpleasant.
 Save to Pinterest
 There's something meditative about rolling these—the rhythm of dipping, laying, filling, folding—and I've noticed it's one of those foods that brings people together in a quiet, present way. You can't rush a roll, and you can't be on your phone while making it, which feels like a small gift in our chaotic lives.
Why Fresh Thai Basil Makes All the Difference
The first time I made these with Italian basil because I couldn't find Thai basil, something essential was missing. Thai basil has this peppery, almost anise-like quality that Italian basil just can't replicate—it's what makes the beef filling taste authentically Thai rather than just seasoned. If Thai basil truly isn't available in your area, mint can come close in a pinch, but seek out Thai basil at an Asian market if you can. It's worth the trip.
The Dipping Sauce Isn't Optional
I've served these rolls with store-bought sweet and sour sauce out of laziness, and every single person asked where the real sauce was. The dipping sauce is where the magic lives—that balance of fish sauce umami, lime brightness, heat from chilies, and sweetness from sugar elevates the whole experience. Making it takes five minutes and transforms the meal from good to memorable, so please don't skip it.
Rolling Gets Easier and Better
My first batch looked like they'd been in a fight, with wrinkles and tears everywhere, but by roll number eight I found a rhythm and they started looking almost professional. There's a learning curve, but it's short and worth pushing through. Set yourself up for success by having everything prepped and organized before you begin—chaos at the rolling station leads to torn wrappers and frustration.
- Keep a damp towel nearby: Use it to wipe your hands between rolls so the rice paper doesn't stick to your skin and tear.
- Work gently but with confidence: Hesitation makes you apply uneven pressure, which leads to splitting.
- If a wrapper tears, just grab a new one: There's no salvaging a damaged wrapper, so don't waste time trying.
 Save to Pinterest
 These rolls have become my answer to 'I want something healthy but also indulgent,' and making them has become as much about the process as the eating. I hope they become that for you too.
Common Recipe Questions
- → Can I make these rolls ahead of time?
Yes, you can assemble the rolls up to 2–3 hours in advance. Cover them with a damp towel and plastic wrap, then refrigerate. Let them sit at room temperature for 10–15 minutes before serving to soften the rice paper.
- → What can I substitute for Thai basil?
If Thai basil is unavailable, use a combination of Italian basil and fresh mint to mimic the aromatic, slightly anise-like flavor. The taste will be similar, though not identical.
- → How do I prevent rice paper from sticking?
Lightly oil your rolling surface or use a damp, clean kitchen towel. Dip rice paper briefly in warm water (3–5 seconds) and allow it to soften on the board rather than over-soaking it.
- → Can I make these gluten-free?
Absolutely. Use gluten-free soy sauce or tamari and ensure your oyster sauce is gluten-free. Rice paper and all other ingredients are naturally gluten-free.
- → What other proteins work well in these rolls?
Ground turkey, chicken, or pork are excellent alternatives. You can also use crumbled tofu or tempeh for a plant-based version. Adjust cooking times as needed.
- → How spicy are these rolls?
The heat level depends on the amount of Thai chilies you use. Start with one chili for mild heat, or omit them entirely and add chili flakes to taste. The dipping sauce can also be adjusted for spice preference.