 Save to Pinterest
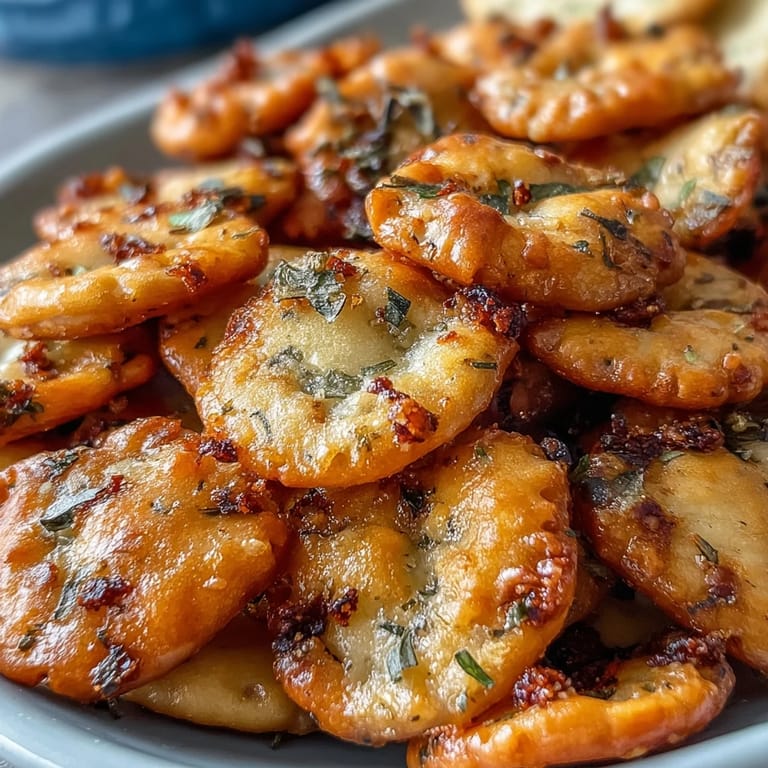
 My neighbor showed up with a bowl of these ranch oyster crackers during a particularly boring Sunday afternoon, and I couldn't stop eating them straight from the container. The way they disappeared faster than any chip or pretzel I'd ever made suddenly made sense—there's something about that crispy, savory coating that just works. I've since made them at least a dozen times, mostly because they require barely any effort and somehow make you feel like a snack genius. The beauty is that you probably have half these ingredients already, and the rest takes longer to say than it does to make.
Last fall, I brought these to a game day gathering, and they vanished before halftime while everyone was arguing about the calls. A friend actually asked for the recipe mid-bite, which is the highest compliment a snack can receive in my house.
Ingredients
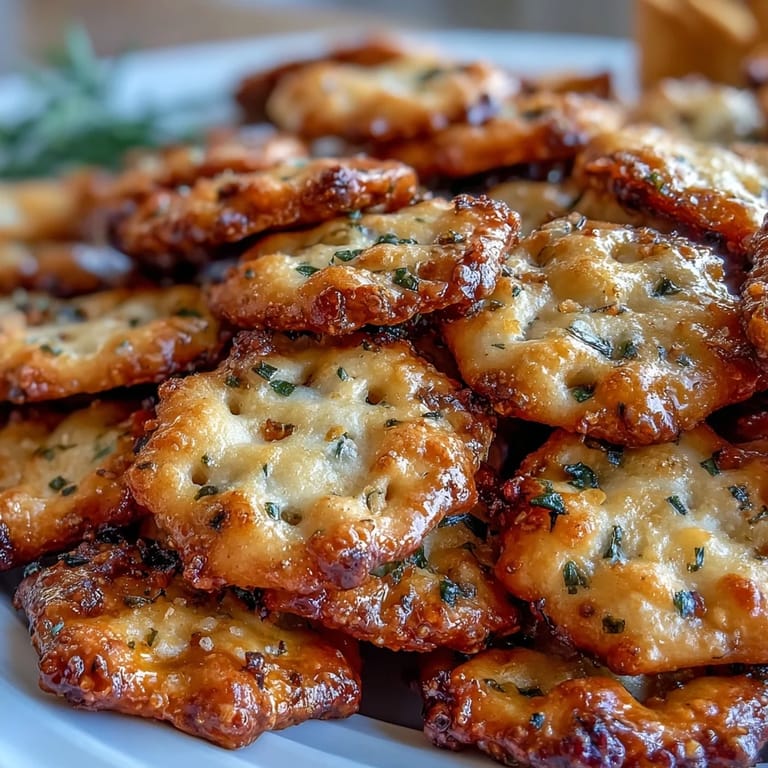
- Oyster crackers: The 9 to 10 ounce bag is your base, and they're sturdy enough to hold the coating without falling apart or getting soggy before they hit the oven.
- Vegetable oil or melted butter: This carries all the seasoning and gets them golden, so don't skip it or try to use a spray because it won't coat evenly enough.
- Ranch seasoning mix: Store-bought works beautifully, but homemade is cheaper if you're making these often and gives you control over the saltiness.
- Dried dill: Totally optional but recommended because it adds a little brightness that makes people wonder what your secret ingredient is.
- Garlic powder and onion powder: Just a touch of each deepens the savory flavor without making them taste like you went overboard.
Tired of Takeout? 🥡
Get 10 meals you can make faster than delivery arrives. Seriously.
One email. No spam. Unsubscribe anytime.
Instructions
- Get your oven and setup ready:
- Preheat to 250°F and line your baking sheet with parchment paper so nothing sticks and cleanup is basically nonexistent.
- Combine your crackers:
- Dump all the oyster crackers into a large mixing bowl, which gives you plenty of room to toss them without sending them flying across your counter.
- Mix the seasoning blend:
- In a separate small bowl, whisk together the oil or melted butter with the ranch mix, dill, garlic powder, and onion powder until it looks like a light, even coating. Let it sit for just a minute so the dry seasonings can absorb a bit of the oil.
- Coat everything evenly:
- Pour the seasoning mixture over the crackers and toss gently but thoroughly—this is the moment that determines if you get uniform golden crackers or some that taste boring and some that taste amazing. Take your time here, making sure every cracker gets a little something.
- Spread and bake:
- Spread them in a single layer on your prepared baking sheet and slide them into the oven for 15 to 20 minutes, stirring halfway through so they toast evenly and nothing burns at the edges.
- Cool and crisp up:
- Pull them out when they're golden and let them cool completely on the baking sheet, because they'll actually get crispier as they cool down. This is key—don't move them to a plate too early or you'll miss that perfect texture.
- Store for later:
- Once completely cool, transfer them to an airtight container where they'll stay fresh and crunchy for up to two weeks, though honestly they rarely last that long.
 Save to Pinterest
 There's something about offering someone a snack you made yourself that feels more genuine than anything store-bought, and these crackers have genuinely sparked conversations about why simple food sometimes tastes better.
Flavor Variations to Explore
The ranch base is classic, but once you nail this technique you can absolutely experiment with different seasoning blends to match your mood or what you're serving them with. Italian seasoning gives them a Mediterranean vibe, taco seasoning makes them borderline addictive with salsa, and a little cayenne pepper or smoked paprika transforms them into something with actual bite that'll wake people up.
Why These Work as Party Food
They're the kind of snack that feels intentional but isn't fussy, which means you can make them ahead, they travel well, and they somehow make any gathering feel more put-together than it actually is. Plus, unlike most homemade snacks, these don't need to be served at any particular temperature—they're just as good fresh from the container as they are an hour later.
Beyond Just Snacking
These aren't just a standalone snack if you don't want them to be—they've got real uses that stretch their value in your kitchen. Crumble them over soup for texture, sprinkle them on salads to replace croutons, or honestly just keep them around for those moments when you need something to munch on while cooking dinner. A few quick thoughts before you get started: keep your tossing gentle so the crackers don't break into tiny pieces, taste a couple after cooling to make sure the seasoning is balanced to your preference, and remember that these keep best in a truly airtight container or they'll absorb moisture from the air and get soft.
- If you're making these for someone with dietary restrictions, gluten-free oyster crackers and dairy-free ranch mix swap in seamlessly without any real difference in how they turn out.
- You can double or triple the recipe without any issues, and they're actually perfect for making a day or two ahead if you're planning ahead for an event.
- If they somehow do get a little soft before you finish them, a quick 5-minute stint in a 200°F oven will crisp them right back up.
 Save to Pinterest
 These crackers have quietly become one of my go-to recipes because they prove that sometimes the best snacks are the ones you make with almost no thinking. Try them once and you'll understand why they keep disappearing.
Common Recipe Questions
- → How long do these stay fresh?
Stored in an airtight container at room temperature, these crackers remain perfectly crispy for up to 2 weeks. Make sure they're completely cooled before storing to prevent moisture buildup.
- → Can I make these spicy?
Absolutely! Add a pinch of cayenne pepper, smoked paprika, or red pepper flakes to the seasoning mixture for a spicy kick. Start with 1/8 teaspoon and adjust to your heat preference.
- → What's the best oil to use?
Vegetable oil, canola oil, or melted butter all work beautifully. Butter adds richer flavor, while oil helps the seasoning adhere more evenly and results in an extra-crispy texture.
- → Can I use different crackers?
Yes! Small saltines, mini pretzels, or cheese crackers work well. Just adjust the baking time accordingly—smaller pieces may need less time, while thicker crackers might take a few extra minutes.
- → Do I need to stir during baking?
Stirring halfway through ensures even coating and prevents burning. This simple step guarantees every cracker gets perfectly golden and crispy on all sides.