 Save to Pinterest
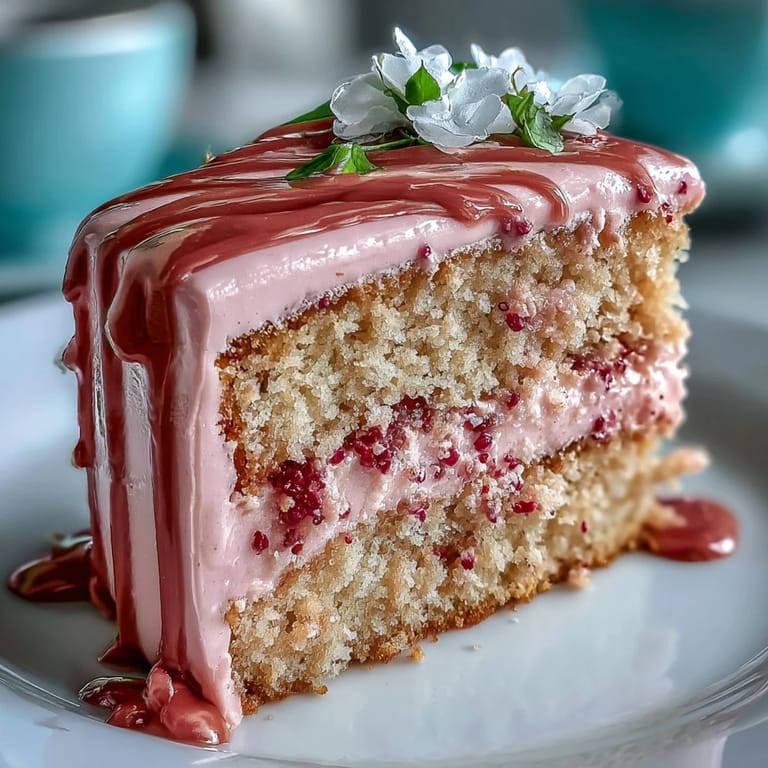
 What caught my attention the first time I baked this Rosé Velvet Cake wasn’t how pretty it looked, but that faint aroma of rosé that floated through the kitchen while the cake layers cooled. I found myself humming as I mixed the rose-pink batter, a little giddy from sneaking quick spoonfuls between steps. The gold drip was a new adventure—it left my hands sparkled and my countertop flecked with luster dust. Sometimes, turning a cake into a celebration almost feels easier than the party itself. By the time the last edible petal was placed, I was sure I’d baked something magical enough to toast with.
Once, when I made this for my friend’s bridal shower, the laughter around the table grew louder with every slice served. Someone ended up snapping a photo before we’d even cut it—the gleam of gold against the soft pink layers was just irresistible. That afternoon, the cake became a centerpiece that people couldn’t stop talking about. There’s something about shimmering desserts that makes everyone pause and appreciate the moment. The compliments came with every forkful, but it was the look on my friend’s face that I remember most.
Ingredients
- All-purpose flour: Go with a good quality flour for the fluffiest layers—sift it to avoid clumps in your batter.
- Granulated sugar: This gives the cake its structure and delicate sweetness.
- Baking soda: A little is all you need for just the right lift.
- Fine salt: Don’t skip this—salt sharpens the flavor and balances the sweetness.
- Cocoa powder (unsweetened): Adds that classic velvet taste, but use sparingly so the delicate rosé shines through.
- Vegetable oil: Keeps the crumb moist, so your cake is never dry.
- Eggs (room temperature): Bringing them to room temp means they emulsify perfectly for a smooth batter.
- Buttermilk (room temperature): Buttermilk’s tang is key for both texture and depth—let it sit out so it blends better.
- Rosé wine: Choose a dry or sparkling rosé with subtle fruit notes; avoid sweet ones that mask the floral aroma.
- Vanilla extract: Just a splash gently rounds out the cake’s flavor.
- White vinegar: A trick from classic velvet cakes that keeps the crumb light and acts with cocoa for that soft hue.
- Pink gel food coloring: Gel coloring gives the most vibrant color without thinning your batter.
- Unsalted butter (room temperature): Essential for a cloud-like buttercream and brings everything together.
- Powdered sugar (sifted): Skip lumps by sifting it first—it makes the frosting shine (literally and figuratively).
- Edible gold luster dust: Look for a food-safe version and use a small brush for precise shimmer on the drips.
- Heavy cream: It creates the perfect consistency for the white chocolate drip, helping it flow but not run wild.
- White chocolate chips: Melts smoothly and gives you the right base to paint gold.
- Vodka or clear lemon extract: This evaporates as you paint, setting the gold without leaving a taste.
- Edible additions (rose petals, berries): Optional but so party-worthy for a floral finish.
Tired of Takeout? 🥡
Get 10 meals you can make faster than delivery arrives. Seriously.
One email. No spam. Unsubscribe anytime.
Instructions
- Get set up:
- Preheat your oven to 350°F (175°C), grease three pans generously and line them with parchment, making sure the sides are smooth for flawless layers later.
- Mix dry ingredients:
- Sift flour, sugar, baking soda, salt, and cocoa powder into a big bowl; the sifting clouds will make your kitchen feel like a tiny bakery.
- Make the batter:
- In a separate bowl, whisk together oil, eggs, buttermilk, rosé, vanilla, and vinegar till glossy—then pour over the dry and stir gently; swirl in the pink coloring last, stopping when you’re happy with the hue.
- Bake the cakes:
- Divide evenly into your pans and level with a spatula; bake until the tops spring back and your tester comes out clean, usually about 30–35 minutes.
- Cool down:
- Let the cakes rest in their pans for 10 minutes, then turn them out gently to finish cooling on a wire rack; don’t rush this part, or you’ll risk a sticky mess.
- Whip up the buttercream:
- Beat the butter on high until it’s as pale as frosting can get, slowly add sugar, then whip in rosé, vanilla, and just a pinch of salt top it off until the texture is dreamy and spreadable.
- Build the layers:
- Trim any domes, then stack with generous spreads of buttercream in between; crumb coat first, chill, then slather on that final coat until it’s as smooth as you can get it.
- Make the gold drip:
- Melt white chocolate and cream, let it cool to just-warm, then swirl it around the edge of the chilled cake so it drips just so; blend gold luster dust with vodka and gently paint each drip for that show-stopping shimmer.
- Add your artistry:
- Sculpt the finishing touches with petals, berries, or extra gold flecks—step back and admire your work before the first slice.
 Save to Pinterest
  Save to Pinterest
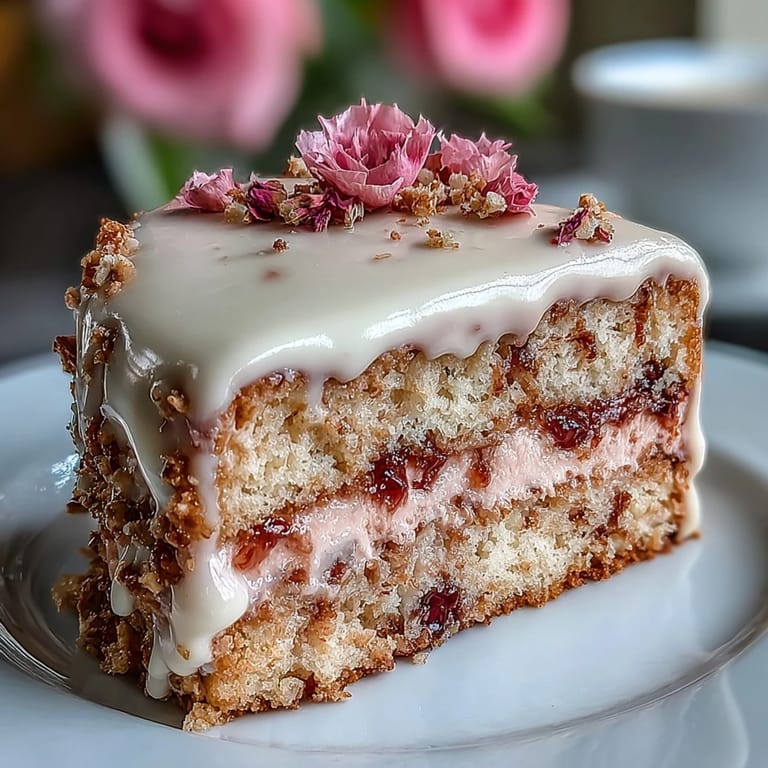
 There was a split second, right before serving, when everyone leaned in to admire the cake one last time; that hush felt like a toast in itself. Sharing this cake at that bridal shower turned a good day into an unforgettable one—it was more than dessert, it was a little edible celebration.
Making It Your Own
Don’t be afraid to riff on the look—try adding candied rose petals, or even a delicate scattering of dried raspberries for a tart punch of color. The decor can be as classic or playful as you like. I once piped buttercream roses around the edge, which made the whole cake look like a posh bouquet. Subtle pearlescent sprinkles or even a handful of sugared grapes work if you want to lean into opulence. Personal touches always make the cake a true reflection of the celebration.
How to Make Decorating Simple (and Not Stressful)
If swirling buttercream and dripping gold sounds daunting, it helps to remember that texture is beautiful—perfect smoothness isn’t the goal. I set my phone timer for each chill session so I wasn’t tempted to rush. Using an offset spatula made smoothing the icing oddly soothing after a busy morning. More than once, I’ve welcomed a few ‘imperfections’—somehow, they just invite more compliments. Letting go of perfection lets your creativity shine through (and keeps the process fun).
Party Prep and Serving Tips
Refrigerate the finished cake for up to a day in advance, but bring it out well before serving—frosting tastes best at room temperature. A hot knife will give you cleaner slices, especially if you wipe it between cuts. If you’re transporting, a little extra support in the car (towels around the box) saves anxiety.
- Keep a few extra rose petals on hand in case you need a last-minute touch-up.
- Clear space in your fridge ahead of time so nothing bumps the sides of your handiwork.
- Carefully transfer the cake by lifting from the base, never the sides.
 Save to Pinterest
  Save to Pinterest
 Even if your drips don’t all match or a petal falls astray, a shimmering Rosé Velvet Cake turns any table into a celebration. I hope it brings a sparkle to your next big occasion.
Common Recipe Questions
- → What type of rosé works best?
Choose a dry or lightly sparkling rosé with floral or red-fruit notes; it adds subtle acidity and aroma without overwhelming the batter or buttercream.
- → How do I keep the layers moist?
Use room-temperature buttermilk and oil for tender crumbs, avoid overmixing, and resist overbaking. Brush layers lightly with a rosé syrup if extra moisture is needed.
- → How is the gold drip made safe and shiny?
Make a white chocolate drip with cream, let it cool slightly, then paint set drips with edible gold luster dust mixed with a food-safe clear extract or vodka. Only use edible luster products.
- → Can the cake be prepared ahead of time?
Yes. Bake layers a day ahead and wrap tightly. Assemble and chill to set the crumb coat before final frosting and dripping; bring to room temperature before serving for best texture.
- → Any tips for achieving an even drip?
Cool the drip slightly so it’s pourable but not too hot. Pipe small amounts at the edge to test, then pour and nudge with a spatula. Chill briefly to set before painting with gold.
- → Are there alcohol-free options?
Substitute the rosé with a nonalcoholic rosé-style beverage, diluted fruit syrup, or additional buttermilk and a splash of lemon for brightness without alcohol.