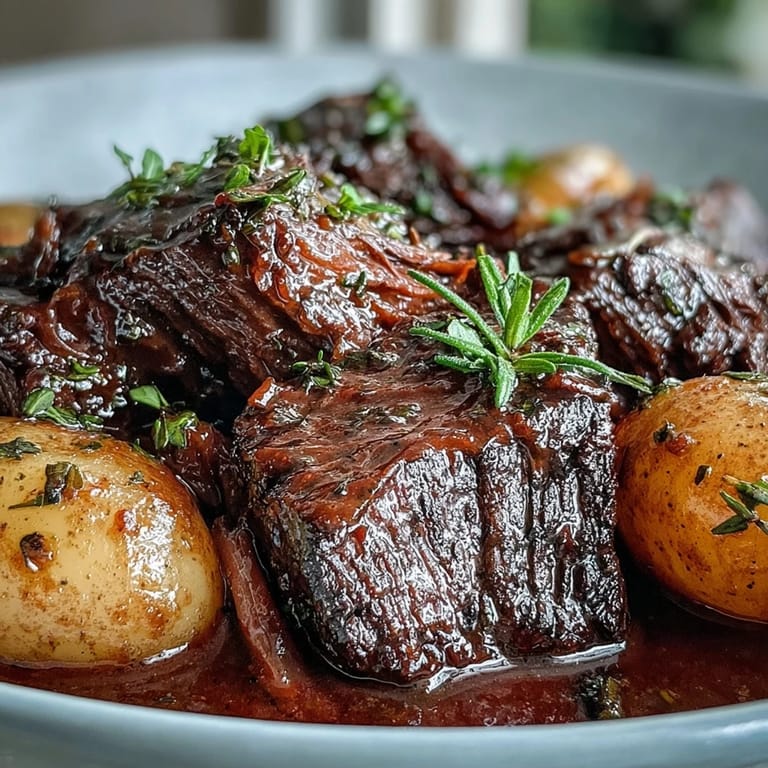
 Save to Pinterest
 There's something about the smell of beef browning in a hot pot that makes you feel like you're doing something right in the kitchen. I was skeptical the first time someone insisted that a pot roast needed hours of gentle heat, but after one bite of meat so tender it practically dissolved on my tongue, I understood why this dish has survived generations of family dinners. The red wine and herbs create this deep, savory gravy that tastes like it took far more effort than it actually did. Now when the weather turns cold, this is the first recipe that comes to mind.
I made this for my dad one Sunday when he was going through a rough patch, and I remember how he closed his eyes after that first spoonful, like he was tasting something that reminded him of better times. He asked for seconds before finishing his first plate, and we barely spoke during dinner, which somehow felt like the most important conversation we could have had. That's when I realized pot roast isn't really about the recipe at all, it's about showing someone they're worth three hours of your attention.
Ingredients
- Beef chuck roast or blade roast (3–3.5 lb): The marbling is what makes this work, so don't skimp on quality or try to use leaner cuts, they'll dry out despite all that braising liquid.
- Kosher salt and freshly ground black pepper: Generous seasoning before searing is non-negotiable, it builds the foundation of flavor that the wine and herbs will build upon.
- All-purpose flour (2 tbsp): A light coating helps develop a better crust during searing and thickens the braising liquid slightly as it cooks.
- Olive or vegetable oil with butter (3 tbsp plus 1 tbsp): The combination gives you enough fat to sear properly without burning, and the butter adds a richness that pure oil can't deliver.
- Yellow onion, garlic, carrots, celery: These aromatics are cooked down into the braising liquid, creating the backbone of the sauce rather than remaining as distinct garnish.
- Baby potatoes (1 ½ lb): Added halfway through cooking, they absorb the flavorful liquid while staying intact and waxy rather than turning to mush.
- Tomato paste (2 tbsp): A small amount adds depth and umami without making the dish taste tomato-forward, it should feel like a secret ingredient.
- Dry red wine (1 cup): Don't use anything you wouldn't drink, the wine reduces and its flavor concentrates, so cooking wine makes a noticeable difference.
- Low-sodium beef broth (2 ½ cups): Low-sodium is key because you control the salt level and the sauce reduces without becoming too salty by the end.
- Worcestershire sauce, rosemary, thyme, bay leaves: The herbs should be fresh if possible, they perfume the whole pot and are essential to the classic flavor profile.
- Cornstarch slurry (1 ½ tbsp with water, optional): Only use this if you prefer a thicker gravy, some people love it loose and soupy, which is equally valid.
Tired of Takeout? 🥡
Get 10 meals you can make faster than delivery arrives. Seriously.
One email. No spam. Unsubscribe anytime.
Instructions
- Set your oven temperature and prepare the meat:
- Preheat your oven to 300°F if you're going the oven route, though stovetop works just as well. Pat the beef completely dry with paper towels, then season every surface generously with salt and pepper, remembering to get the edges.
- Coat lightly with flour:
- Dust the roast with flour and shake off the excess, you want a thin coating that helps with browning, not a thick crust. This step seems small but it makes a visible difference in how golden and appetizing the sear becomes.
- Sear the meat until deeply browned:
- Heat the oil and butter in your pot over medium-high heat until it shimmers, then carefully lay the roast in and resist the urge to move it for 4–5 minutes. You're looking for a dark golden crust, so give each side its full time without jostling it around.
- Build the aromatic base:
- After removing the roast, add onion wedges to the same pot and let them caramelize for 3–4 minutes, then add the garlic for just 30–60 seconds until it becomes fragrant. You'll notice how the browned bits on the bottom of the pot are starting to stick, which is exactly what you want.
- Deepen the flavors with tomato paste:
- Stir in the tomato paste and cook it for 1–2 minutes until it darkens, this step concentrates the flavor and removes any raw taste. It'll look almost burnt, which is the point, it adds a subtle depth that people won't be able to identify but will taste.
- Deglaze with wine and reduce:
- Pour in the red wine and use a wooden spoon to scrape up all those browned bits from the bottom, then let it simmer for 2–3 minutes. You're reducing the wine slightly to cook off the harsher alcohol notes and concentrate its flavor.
- Add the braising liquid and seasonings:
- Stir in the beef broth and Worcestershire sauce, then add your herb sprigs and bay leaves, giving everything a gentle stir to combine. Return the roast to the pot nestled into the liquid, which should come halfway up the sides of the meat.
- Begin the long, gentle braise:
- Bring everything to a gentle simmer, cover tightly, then either reduce heat to low on the stovetop or transfer to your 300°F oven. The covered pot creates steam that helps break down the tough connective tissue in the meat.
- Flip the roast and add vegetables:
- After 1½ hours, carefully turn the roast over using tongs, then distribute carrots, celery, and potatoes around it, making sure they're mostly submerged in the liquid. Re-cover and continue cooking for another 1½–2 hours until the beef shreds easily with a fork and the vegetables are tender but not falling apart.
- Rest and finish the sauce:
- Transfer the roast and vegetables to a platter and tent loosely with foil to keep warm while you finish the sauce. Skim the excess fat from the surface, then if you prefer a thicker gravy, bring the liquid to a simmer and stir in the cornstarch slurry, cooking for 2–3 minutes until it reaches your desired consistency.
- Final assembly and serving:
- Shred or slice the beef against the grain into large pieces, discard the herb stems and bay leaves, then return everything to the pot or arrange on a platter and spoon the sauce over top. Finish with fresh parsley if you have it, and serve hot with crusty bread or over noodles or mashed potatoes.
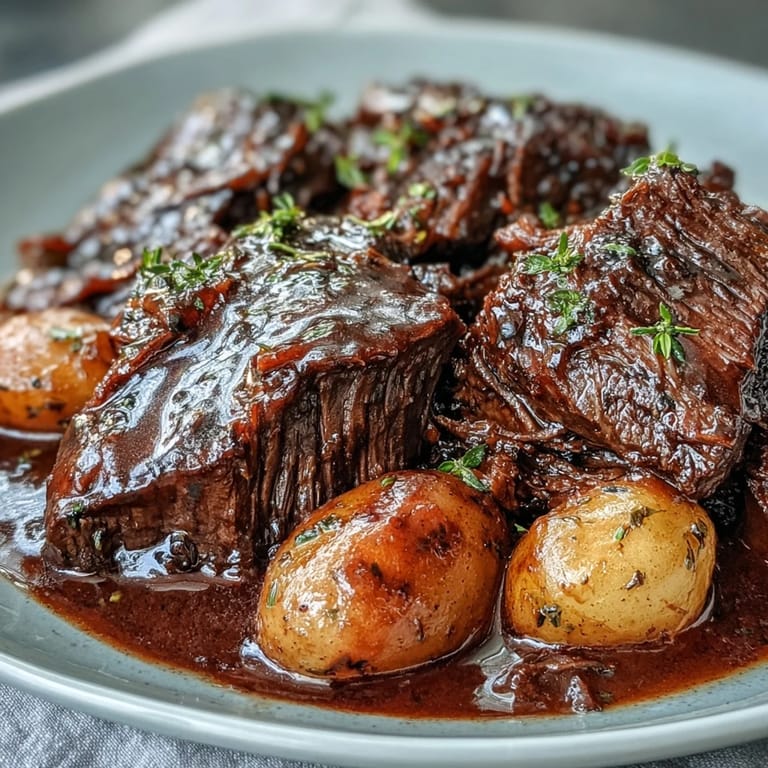 Save to Pinterest
 I once made this for a dinner party and someone asked if I'd been cooking it for three days because the flavor was so complex and developed. The truth is, I was mostly sitting around drinking wine while the oven did the work, which felt like cheating until I realized that's exactly what made it perfect for entertaining. You get to spend time with your guests instead of being chained to the kitchen, and somehow that makes the food taste even better.
Why Searing Matters More Than You'd Think
The moment that hot oil hits the cold meat, you hear this satisfying sizzle that tells you something important is happening, that's the Maillard reaction creating hundreds of new flavors that won't exist any other way. I used to think searing was just for looks, but once I skipped it to save time and the resulting pot roast tasted flat and one-dimensional, I never made that mistake again. The deep brown crust is like a promise that the gravy will be rich and complex, and it absolutely delivers on that promise.
The Slow Cooker Method
If you have a slow cooker, you can still make this by doing all the searing in a regular pot first, then transferring everything to the slow cooker, which means you get all the flavor development without having to tend a pot on the stove. Cook on low for 8–10 hours or high for 5–6 hours, adding the vegetables halfway through so they stay firm rather than turning into paste. The slow cooker method is perfect for people who want a completely hands-off meal or prefer to cook overnight and wake up to dinner practically ready.
Variations and Storage
Leftovers are genuinely better the next day after the flavors have had time to fully meld and settle, and they're endlessly versatile for sandwiches on crusty bread, tucked into tacos with fresh cilantro, or served over rice or creamy polenta for something different. You can also make this leaner by trimming visible fat before cooking, or richer by using half homemade stock and half broth if you have stock available, and it freezes beautifully for up to three months. For a gluten-free version, just swap the flour for cornstarch or a gluten-free flour blend and check your broth and Worcestershire sauce labels to ensure they're certified gluten-free.
- Store leftovers in an airtight container in the refrigerator for up to four days, the meat and sauce keep beautifully together.
- Freeze in portions for up to three months and thaw overnight in the refrigerator before reheating gently on the stovetop.
- Reheat slowly over medium-low heat with a splash of broth to restore the sauce's silky consistency.
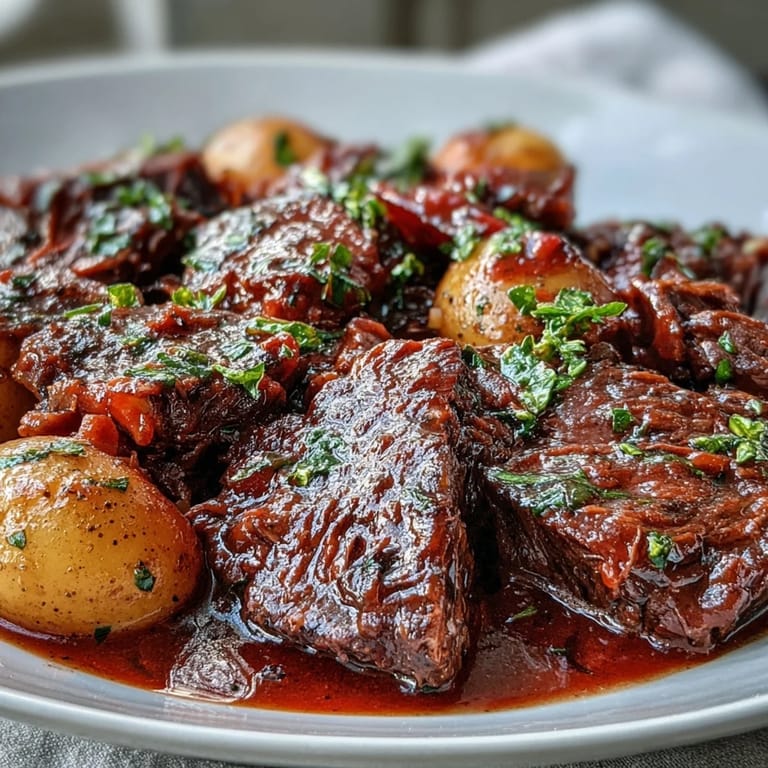 Save to Pinterest
 This pot roast has become my answer to almost any cooking question, because there's something about creating something this comforting and delicious that makes you feel like you belong in the kitchen. Make it once and you'll understand why it endures.
Common Recipe Questions
- → What cut of beef works best for pot roast?
Chuck roast or blade roast with good marbling works best as the fat renders during slow cooking, keeping the meat moist and tender.
- → Can I make this in a slow cooker?
Yes, after searing the meat and aromatics, transfer everything to a slow cooker. Cook on low for 8-10 hours or high for 5-6 hours, adding vegetables halfway through.
- → How do I know when the pot roast is done?
The beef should be fork-tender and easily pull apart when fully cooked. This typically takes 3-3.5 hours of braising at low temperature.
- → Can I substitute the red wine?
Yes, you can use additional beef broth instead of wine for a non-alcoholic version, though the flavor will be slightly less complex.
- → Why is searing the meat important?
Searing creates a caramelized crust that adds deep, rich flavor to the dish through the Maillard reaction, which is essential for developing the gravy's complexity.
- → How should I store and reheat leftovers?
Store in an airtight container in the refrigerator for up to 4 days. The flavors deepen overnight, making leftovers even better. Reheat gently on the stovetop or in the oven.