Master the art of frosting mini cakes with our step-by-step guide for perfect results every time.
Table of Contents
Understanding Mini Cakes and Their Frosting Needs
Mini cakes, also known as cupcakes, are delightful treats that come in various flavors and designs. How to frost mini cakes effectively ensures they not only taste great but also look visually appealing. Whether you’re a beginner or an experienced baker, mastering this skill can elevate your baking game.
Choosing the Right Frosting for Mini Cakes
Selecting the appropriate frosting is crucial. Options include buttercream, cream cheese, ganache, and fondant. Each type offers a unique texture and flavor, suitable for different occasions.
Buttercream Frosting
Buttercream is the most popular choice for frosting mini cakes. It’s versatile, easy to work with, and can be flavored and colored to match any theme. How to frost mini cakes with buttercream involves spreading a smooth layer or using piping techniques for decorative effects.
- Versatility: Can be flavored (vanilla, chocolate, etc.) and colored to fit any occasion.
- Ease of Use: Soft enough to spread easily yet holds its shape well.
- Customization: Perfect for adding personalized touches like sprinkles or edible glitter.
Cream Cheese Frosting
Cream cheese frosting provides a tangy contrast, perfect for red velvet or carrot mini cakes. It’s smooth and spreads easily, making it ideal for intricate designs.
- Flavor Profile: Tangy and slightly sweet, complements rich cake flavors.
- Texture: Creamy and smooth, ideal for spreading and piping.
- Stability: Best used in cooler environments to maintain its consistency.
Ganache and Fondant
Ganache offers a rich, glossy finish, while fondant provides a sleek, professional look. Both are excellent for more elaborate decorations but require precise handling.
- Ganache: Made from chocolate and cream, it hardens to a shiny finish. Ideal for drizzling or covering mini cakes for a luxurious appearance.
- Fondant: A pliable sugar dough that can be molded into various shapes. Provides a flawless, smooth surface perfect for intricate decorations.
Factors to Consider When Choosing Frosting
When deciding how to frost mini cakes, consider the following factors:
- Flavor Compatibility: Ensure the frosting complements the cake flavor.
- Texture Preference: Choose between smooth, creamy, or glossy finishes based on desired aesthetics.
- Skill Level: Some frostings like fondant require more skill and practice.
- Occasion: Select frosting that suits the event, whether it’s a casual party or a formal celebration.

Tools and Supplies Needed for Frosting Mini Cakes
Having the right tools can make the frosting process smoother and more enjoyable. Here’s what you’ll need:
Essential Tools
- Piping Bags: Essential for precise frosting application. Choose reusable or disposable options based on preference.
- Piping Tips: Various shapes and sizes for different designs. Common types include star, round, and petal tips.
- Offset Spatula: Perfect for spreading frosting evenly across the mini cake.
- Turntable: Helps in rotating the mini cakes for easy frosting. Makes achieving a smooth, professional finish much easier.
- Bench Scraper: Useful for smoothing large areas and ensuring an even layer of frosting.
Optional Enhancements
- Couplers: Allow you to change piping tips without changing the bag, saving time and reducing mess.
- Crumbs Brush: Helps in applying a crumb coat to mini cakes, trapping crumbs and ensuring a clean final layer.
- Smoothers and Scrapers: For achieving a flawless finish, especially when working with thicker frostings like ganache.
- Measuring Spoons and Cups: For precise measurements of ingredients, ensuring consistency in frosting texture and flavor.

Step-by-Step Guide on How to Frost Mini Cakes
Following a systematic approach ensures each mini cake is beautifully frosted. Here’s a comprehensive guide to how to frost mini cakes flawlessly.
Preparing Your Mini Cakes for Frosting
Before frosting, ensure your mini cakes are completely cooled. This prevents the frosting from melting and ensures a smooth application.
Leveling the Cakes
Use a serrated knife to level the tops of the cakes if they’ve domed during baking. This creates a flat surface for an even frosting layer.
- Method: Place the mini cake on a flat surface. Gently slice off the domed top, creating a flat surface.
- Benefit: Ensures the frosting spreads evenly without sliding off.
Applying a Crumb Coat
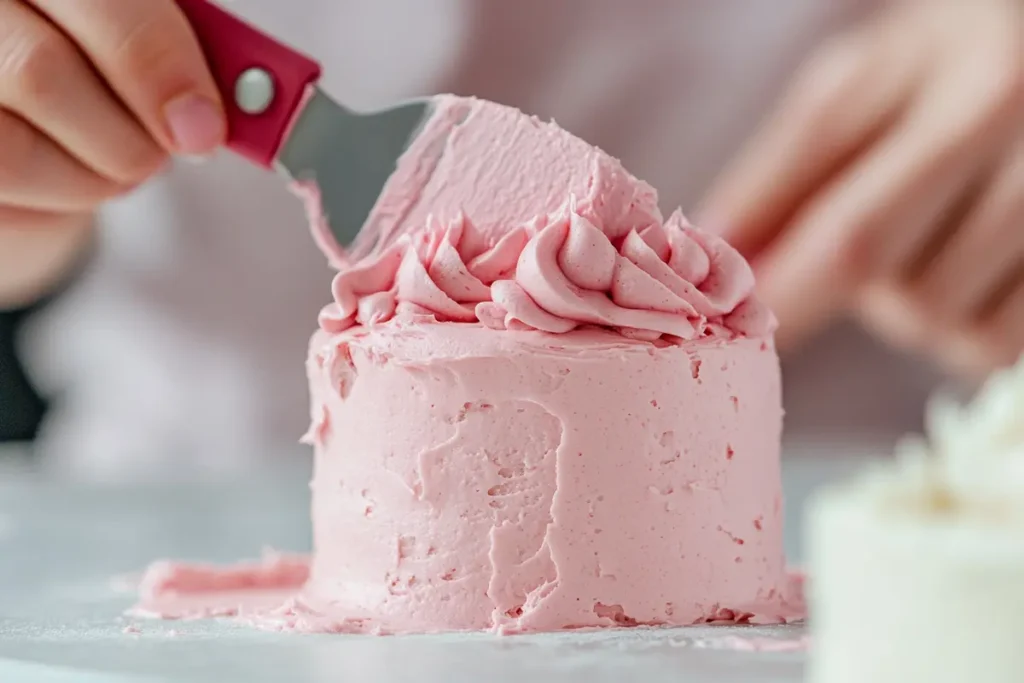
A crumb coat is a thin layer of frosting that traps crumbs. Apply it evenly using an offset spatula and let it set before adding the final layer.
- Application: Spread a thin layer of frosting over the entire mini cake.
- Setting: Chill the cakes in the refrigerator for about 15-20 minutes to set the crumb coat.
- Advantage: Prevents crumbs from mixing into the final frosting layer, resulting in a smooth finish.
Frosting Techniques for Mini Cakes
Different techniques can create various textures and designs on your mini cakes. Here are some popular methods:
Spreading with an Offset Spatula
For a smooth, even layer, use an offset spatula. Start from the center and work outward in gentle strokes.
- Technique: Scoop a generous amount of frosting and spread it evenly over the top and sides.
- Tips: Keep the spatula at a consistent angle to maintain an even surface.
Piping Designs
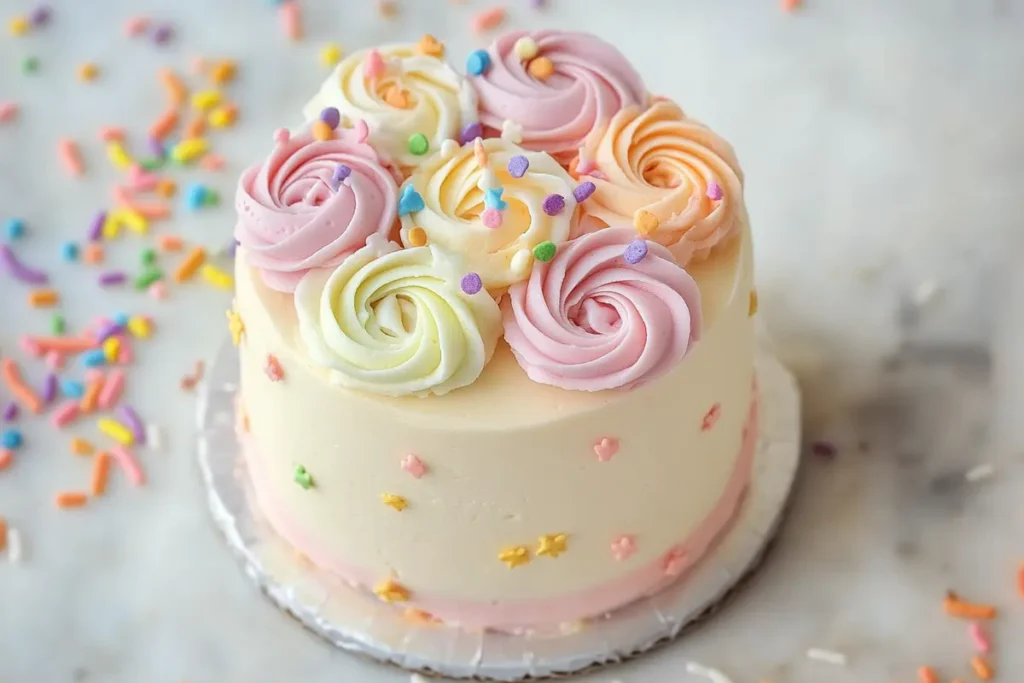
Use piping bags with different tips to create decorative patterns like rosettes, swirls, or borders. Practice on a plate before applying to your mini cakes.
- Design Ideas:
- Rosettes: Classic and elegant, perfect for any occasion.
- Swirls: Adds a dynamic and textured look.
- Borders: Defines the edge of the mini cake, adding structure.
Smoothing with a Turntable
Place the mini cake on a turntable and rotate it while smoothing the frosting with a spatula. This helps achieve a professional finish.
- Process: Apply a generous amount of frosting, then use the spatula to smooth it while the turntable rotates.
- Result: Evenly distributed frosting with minimal streaks.
Layering Flavors
Enhance the visual appeal by layering different frosting flavors or colors. For example, a layer of chocolate ganache over vanilla buttercream can create a stunning effect.
- Combination Ideas:
- Vanilla and Chocolate: Classic combination for a balanced taste.
- Fruit Flavors: Adds a refreshing twist to the traditional frosting.
- Spiced Frostings: Perfect for autumn-themed mini cakes.
Advanced Frosting Techniques
Once you’ve mastered the basics, you can explore more advanced techniques to create intricate designs.
Ombre Frosting
Create a gradient effect by gradually changing the color intensity from top to bottom.
- Method: Start with a darker shade at the base and blend into a lighter shade towards the top.
- Tools: Use multiple piping bags with different color ratios for seamless blending.
Mirror Glaze
Achieve a glossy, mirror-like finish with a smooth glaze that reflects light beautifully.
- Ingredients: Typically made with gelatin, sugar, and chocolate.
- Application: Pour the glaze over the chilled mini cakes, allowing it to spread and set naturally.
Airbrushing
Use an airbrush tool to apply a fine mist of color over the frosting, creating a soft, professional look.
- Effect: Adds depth and dimension without overpowering the underlying frosting design.
- Customization: Allows for precise control over color intensity and placement.

Decorating Mini Cakes: Adding the Finishing Touches
Enhance the appearance of your frosted mini cakes with creative decorations. These final touches can make your mini cakes stand out and match any theme or occasion.
Using Sprinkles and Edible Glitter
Sprinkles and edible glitter add color and sparkle. Sprinkle them over the frosting before it sets for best results.
- Types of Sprinkles:
- Nonpareils: Small, colorful balls that add a festive touch.
- Jimmies: Long, thin sprinkles ideal for linear decorations.
- Confetti Sprinkles: Mixed shapes and colors for a playful look.
- Edible Glitter: Adds a shimmering effect, perfect for celebrations and special occasions.
Adding Fresh Fruits and Flowers
Fresh fruits like berries or edible flowers can provide a natural and elegant touch to your mini cakes.
- Fruit Options:
- Strawberries: Classic and versatile.
- Blueberries: Add a pop of color and texture.
- Kiwi Slices: Exotic and vibrant.
- Edible Flowers:
- Violets: Delicate and colorful.
- Roses: Elegant and timeless.
- Pansies: Versatile and charming.
Incorporating Fondant Decorations
Cut fondant into shapes like stars, hearts, or letters to personalize your mini cakes. Fondant can be colored and flavored to match your theme.
- Shapes and Designs:
- Letters: Spell out messages or initials.
- Shapes: Create themed decorations for holidays or events.
- Figures: Mold fondant into tiny figurines or characters.
- Techniques:
- Rolling: Use a rolling pin to flatten fondant to desired thickness.
- Cutting: Use cookie cutters or molds to shape the fondant.
- Assembling: Attach decorations using a small amount of water or edible glue.
Adding Drizzles and Toppings
Enhance the visual appeal with drizzles of chocolate, caramel, or fruit sauces. Toppings like chopped nuts or coconut flakes can add texture and flavor.
- Drizzle Techniques:
- Freehand: Create abstract patterns for a modern look.
- Templates: Use stencils for precise designs.
- Topping Ideas:
- Chopped Nuts: Almonds, pecans, or walnuts for a crunchy texture.
- Coconut Flakes: Adds a tropical flair.
- Candy Pieces: Mini chocolate chips or candy melts for added sweetness.
Troubleshooting Common Frosting Issues
Even experienced bakers encounter challenges. Here’s how to handle common problems when learning how to frost mini cakes.
Preventing Cracked Frosting: Essential Tips for Flawless Mini Cake Frosting
Cracks occur when the frosting dries too quickly. To avoid this, frost the mini cakes in a cool, humid environment and ensure the cakes are properly cooled before applying frosting.
- Solutions:
- Environment Control: Avoid overly dry or windy areas. Use a humidifier if necessary.
- Proper Cooling: Ensure cakes are completely cooled to prevent frosting from setting unevenly.
- Frosting Consistency: Adjust the consistency of your frosting to be slightly more pliable if cracks persist.
Fixing Uneven Frosting: Tips to Perfectly Frost Mini Cakes Every Time
Use a bench scraper or offset spatula to smooth out uneven areas. Applying a second layer of frosting can also help achieve a uniform appearance.
- Techniques:
- Bench Scraper: Hold the scraper steady against the side of the mini cake while rotating it on a turntable.
- Layering: Apply additional frosting in thin layers, allowing each to set before adding the next.
Dealing with Melted Frosting
If the frosting starts to melt, place the mini cakes in the refrigerator for a few minutes to firm up before continuing.
- Prevention Tips:
- Temperature Control: Work in a cool environment to prevent the frosting from melting.
- Chilled Tools: Keep your tools and piping bags chilled to maintain frosting consistency.
Fixing Lumpy Frosting
If your frosting is lumpy, it may need to be re-whipped or sifted to remove any clumps.
- Solutions:
- Re-Whipping: Beat the frosting again until smooth.
- Sifting: Pass the frosting through a fine sieve to eliminate lumps.
Restoring Over-Mixed Frosting
Over-mixing can cause the frosting to become too soft or lose its structure. To fix this, add more powdered sugar or chill the frosting to firm it up.
- Fixes:
- Adding Powdered Sugar: Gradually incorporate more powdered sugar until the desired consistency is achieved.
- Chilling: Place the frosting in the refrigerator for a short time to help it set.
Tips for Perfectly Frosted Mini Cakes Every Time
Achieving perfection takes practice and attention to detail. Follow these tips to master how to frost mini cakes.
Keep Your Tools Clean and Cold
Cold tools help maintain the consistency of the frosting. Wipe them down with cold water between uses to prevent frosting buildup.
- Maintaining Cleanliness: Prevents cross-contamination of flavors and ensures smooth application.
- Cold Tools: Helps in keeping the frosting firm, especially in warm environments.
Practice Consistent Pressure
Apply even pressure when piping or spreading frosting to ensure uniformity across all mini cakes.
- Technique: Use steady, controlled movements to maintain consistent frosting thickness.
- Tool Handling: Hold piping bags and spatulas firmly but not too tightly to avoid uneven frosting.
Experiment with Flavors and Colors
Don’t be afraid to try new flavors and colors. Experimenting can lead to unique and personalized mini cakes that stand out.
- Flavor Combinations:
- Lemon and Blueberry: Refreshing and vibrant.
- Chocolate and Mint: Classic and invigorating.
- Coconut and Pineapple: Tropical and sweet.
- Color Mixing: Blend different food colorings to create custom shades that match your theme.
Invest in Quality Ingredients
High-quality ingredients can significantly impact the taste and texture of your frosting. Use real butter, fresh cream, and high-quality chocolate for the best results.
- Butter Quality: European-style butter has a higher fat content, resulting in a richer frosting.
- Chocolate Quality: Use couverture or high-cacao-content chocolate for a smoother ganache.
Master the Art of Piping
Piping is a skill that enhances the visual appeal of your mini cakes. Practice different patterns and techniques to become proficient.
- Practice Patterns: Start with basic designs like stars and rosettes before moving to more complex patterns.
- Consistent Speed: Maintain a steady hand and consistent speed to achieve uniform designs.
Use Fresh Frosting
Frosting that has been sitting out for too long can become too soft or dry. Use fresh frosting for the best results.
- Storage Tips: Store unused frosting in an airtight container in the refrigerator. Rewhip before using if it becomes too stiff.
- Batch Preparation: Make frosting in smaller batches to ensure freshness.
Adjust Consistency as Needed
Depending on the ambient temperature and desired application method, you may need to adjust the consistency of your frosting.
- Thick Frosting: Ideal for piping and detailed decorations.
- Thinner Frosting: Better for spreading smoothly with a spatula.
Incorporate Textures
Adding textures to your frosting can enhance both the visual and tactile experience of your mini cakes.
- Textures to Consider:
- Crunchy Toppings: Nuts, candies, or cookie crumbs.
- Smooth Layers: Even, creamy frosting for a classic look.
- Shiny Glazes: Adds a glossy finish to your decorations.
Frequently Asked Questions
How to easily frost mini cupcakes?
To easily frost mini cupcakes, ensure they are completely cooled, use a crumb coat, and apply frosting with a piping bag fitted with a small tip. Practice smooth, even strokes for a professional look.
What is the best piping tip for mini cupcakes?
The best piping tip for mini cupcakes is a small round tip, such as a #2 or #3, which allows for precise and detailed designs suitable for their size.
How do you frost a mini heart cake?
To frost a mini heart cake, use a piping bag with a small round or star tip. Apply frosting in a heart shape or use a flat spatula for smooth coverage. Decorate with edible decorations to enhance the heart theme.
Is it better to frost a cake warm or cold?
It is better to frost a cake when it is completely cooled. Warm cakes can cause the frosting to melt and become runny, while cold cakes help maintain the frosting’s structure and smoothness
Conclusion
Mastering how to frost mini cakes elevates your baking skills and impresses friends and family. With the right techniques, tools, and a bit of practice, you can create beautiful and delicious mini cakes for any occasion. Whether you’re preparing for a casual gathering or a grand celebration, perfectly frosted mini cakes are sure to be a hit.
For More Delicious Recipes :
What Does Cottage Cheese Go Well With
Hot Honey Chicken Tenders: Irresistibly Sweet and Spicy Recipe

